This last Saturday Karyn and Bob came out for a visit and to help for the afternoon. This coincided with the application of the final coat of wax on the floor, so Karyn took over the buffer while I worked with Bob to reinstall the lights in the ceiling.
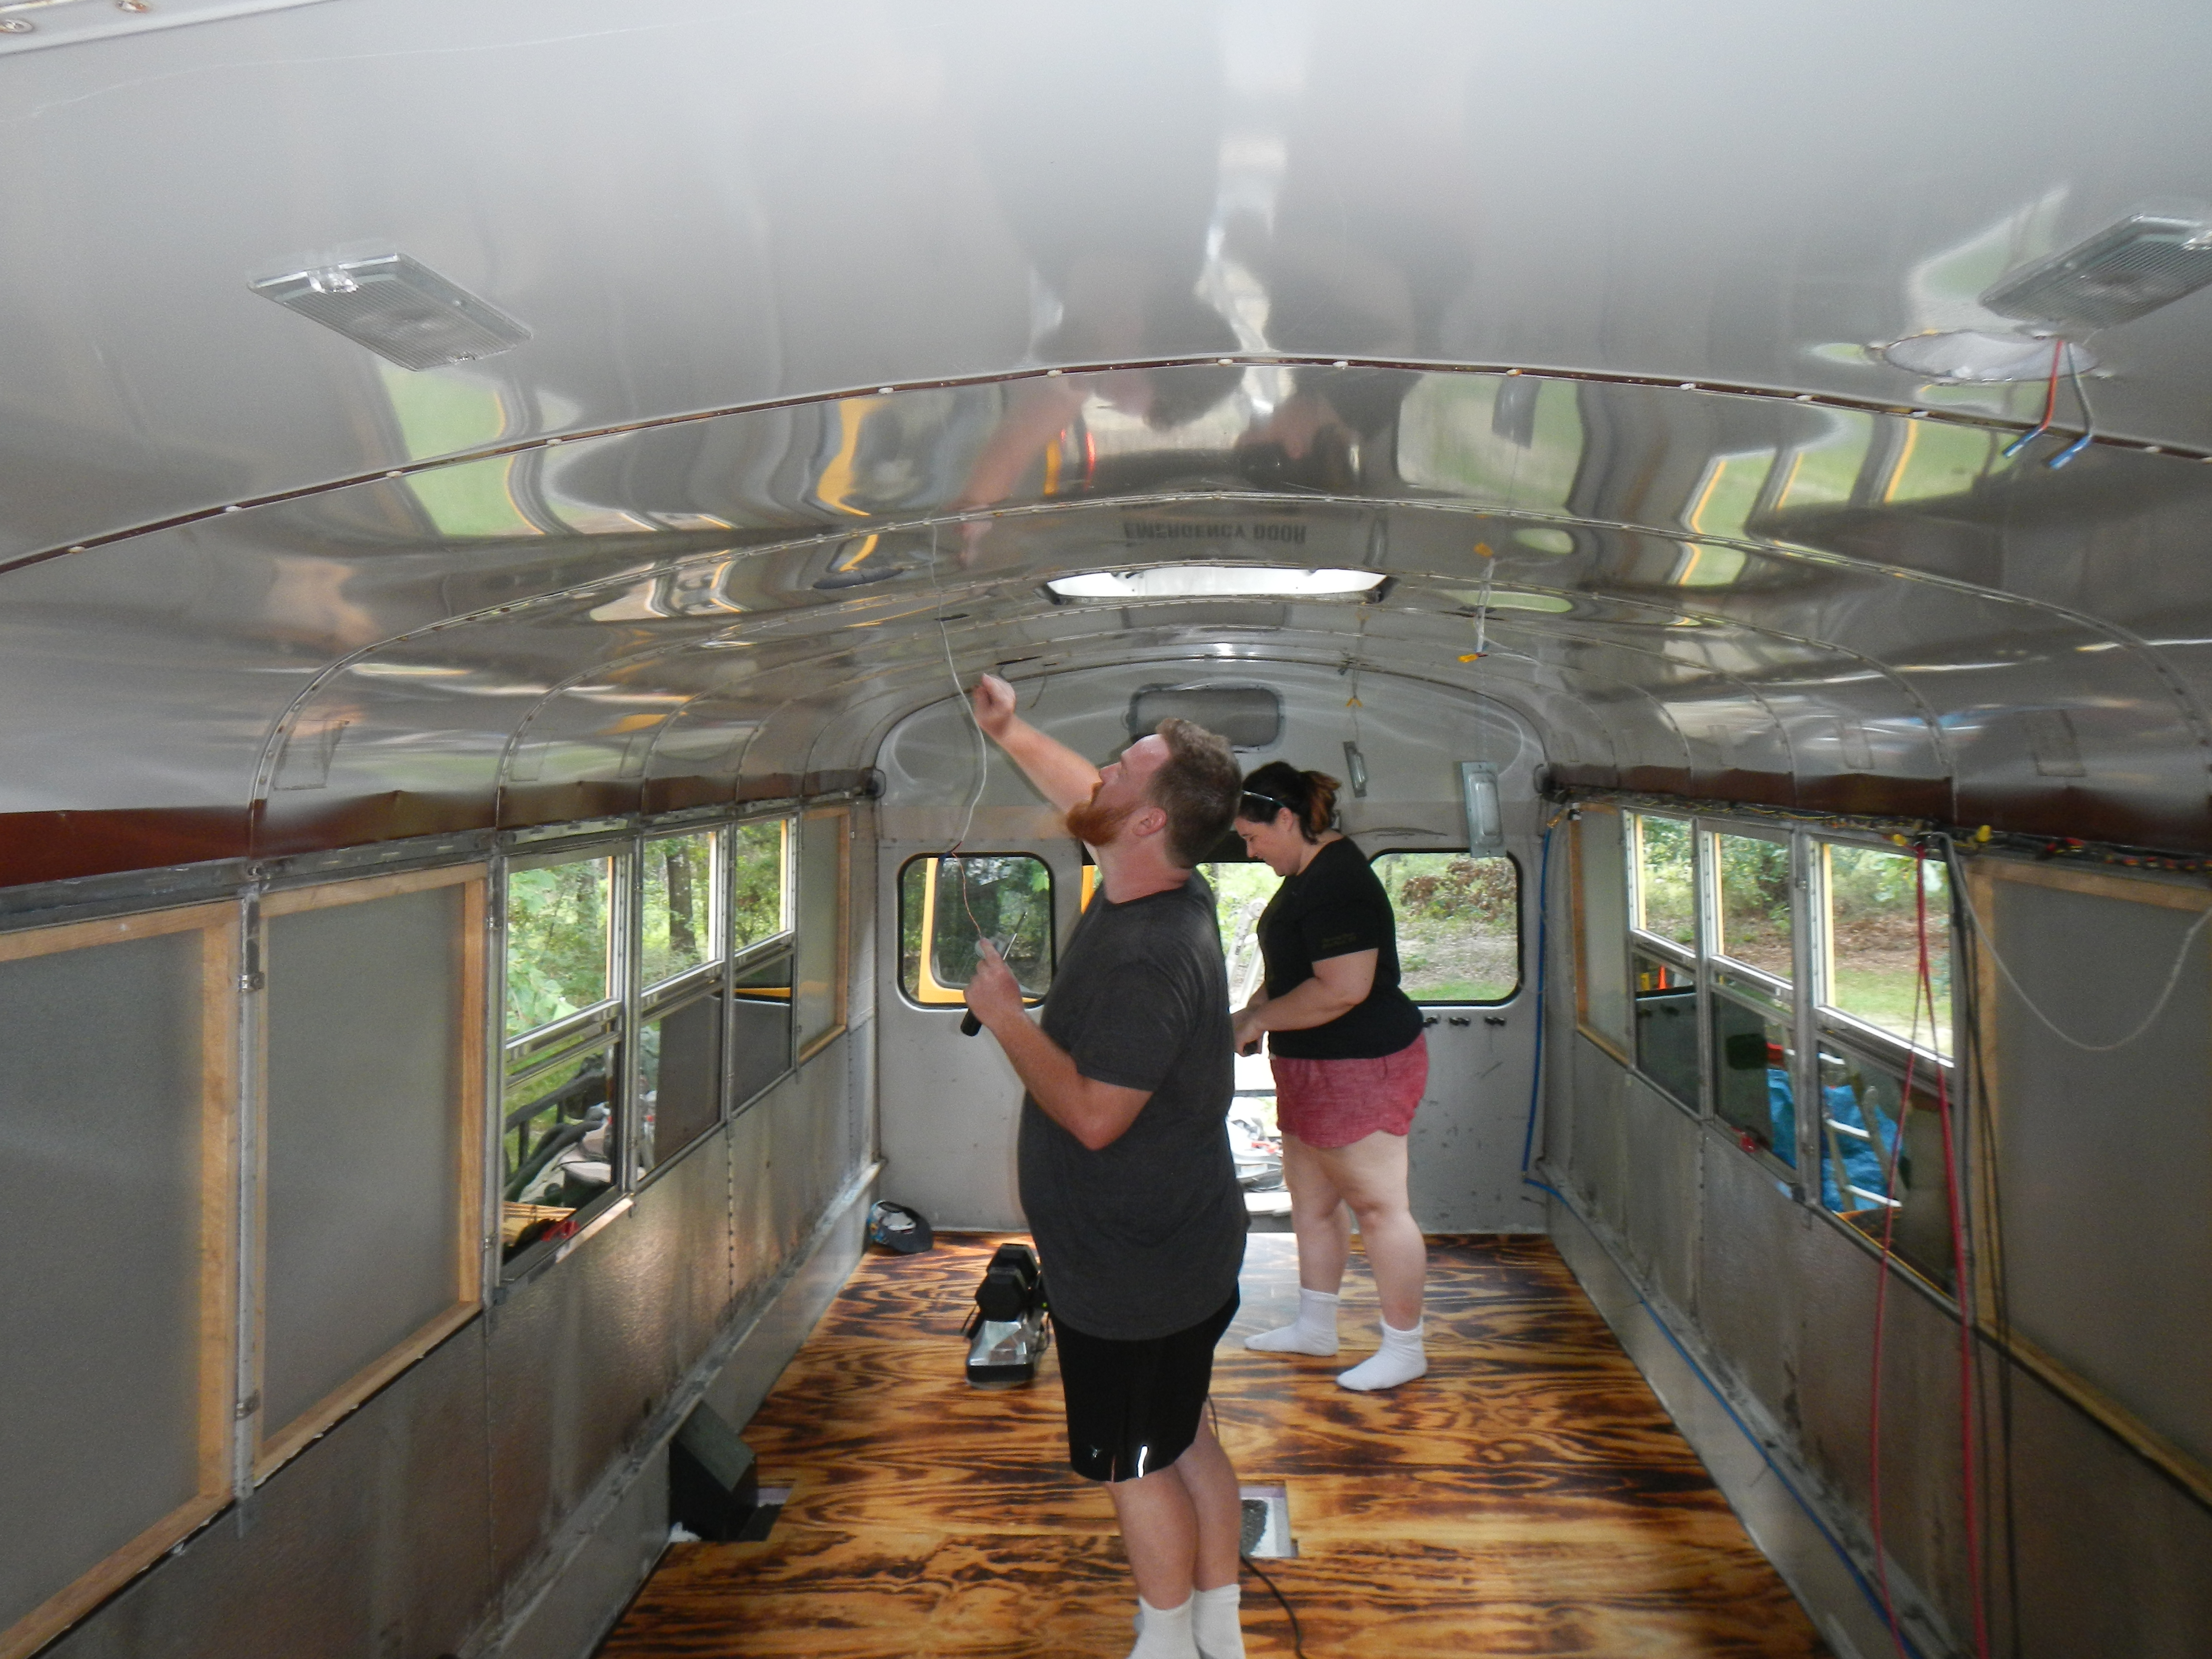
Note that the ceiling panels are installed in this photo- last week was a busy one, during which:
- Wiring in the ceiling was finished off
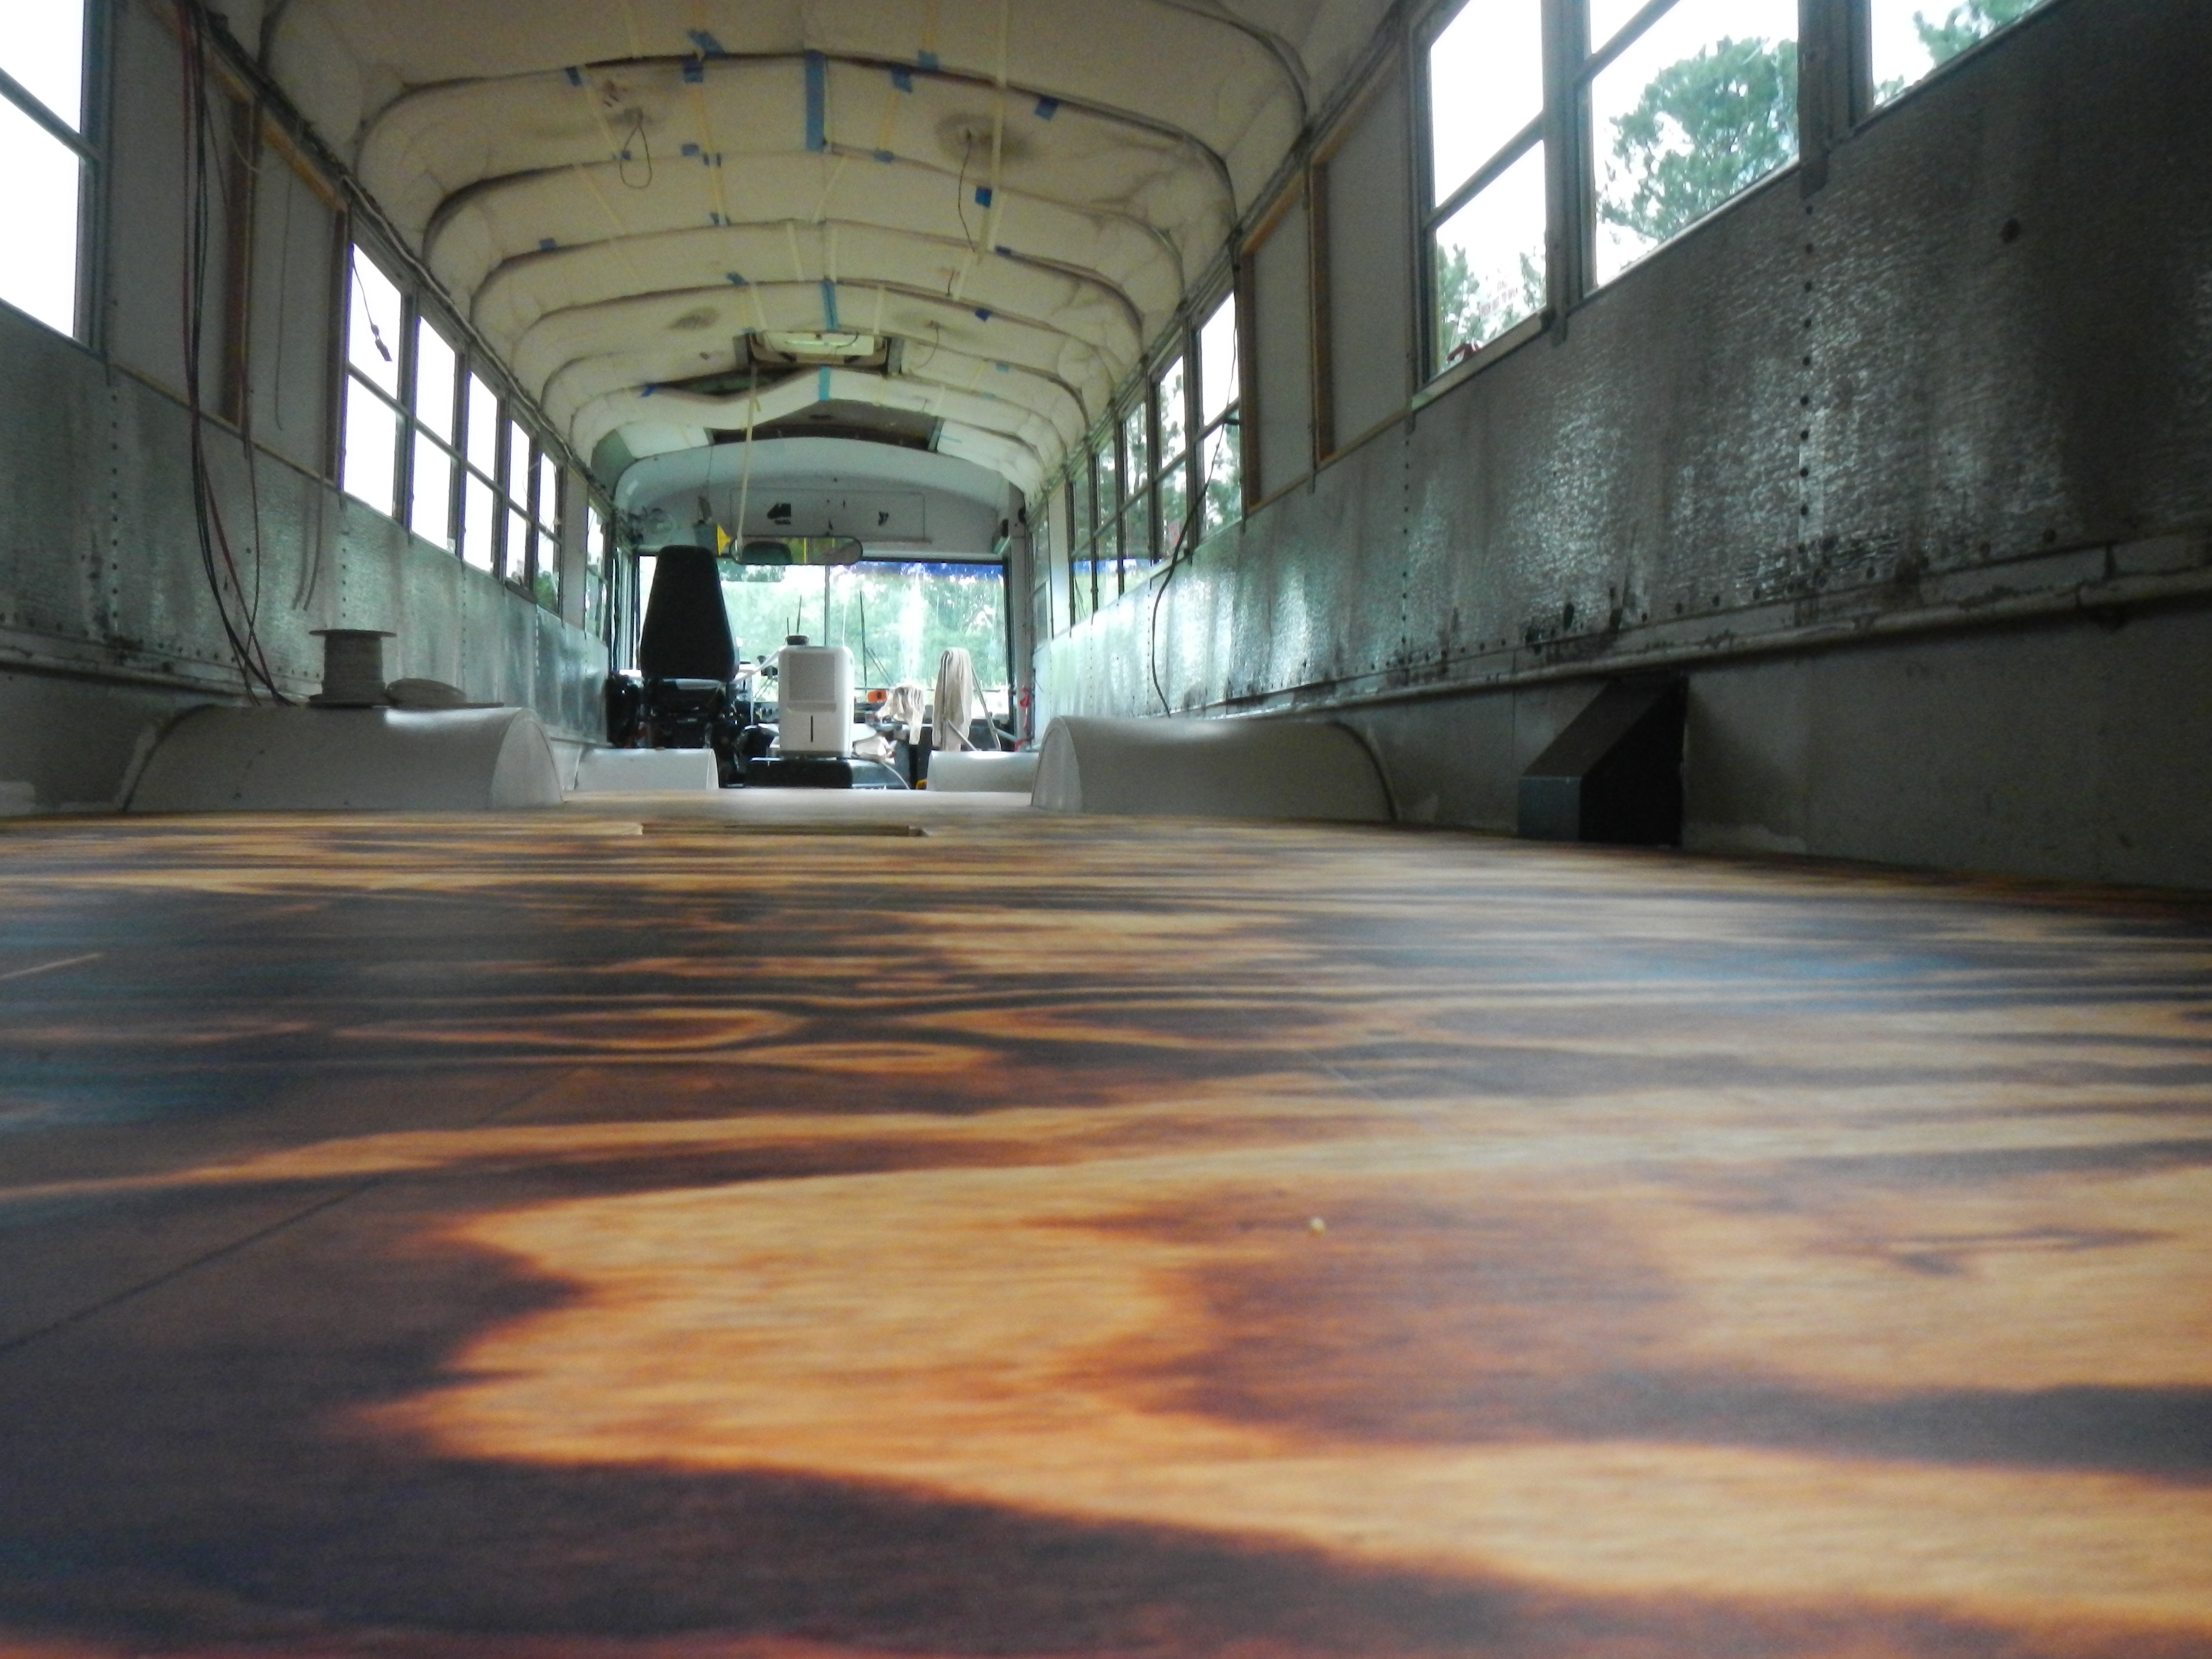
- The floor got two coats of wax
- Ceiling panels were reinstalled over the course of three hot, sweaty days- HUGE credit to my mom here, as I would not have been able to maneuver the panels into place and attach them without her help
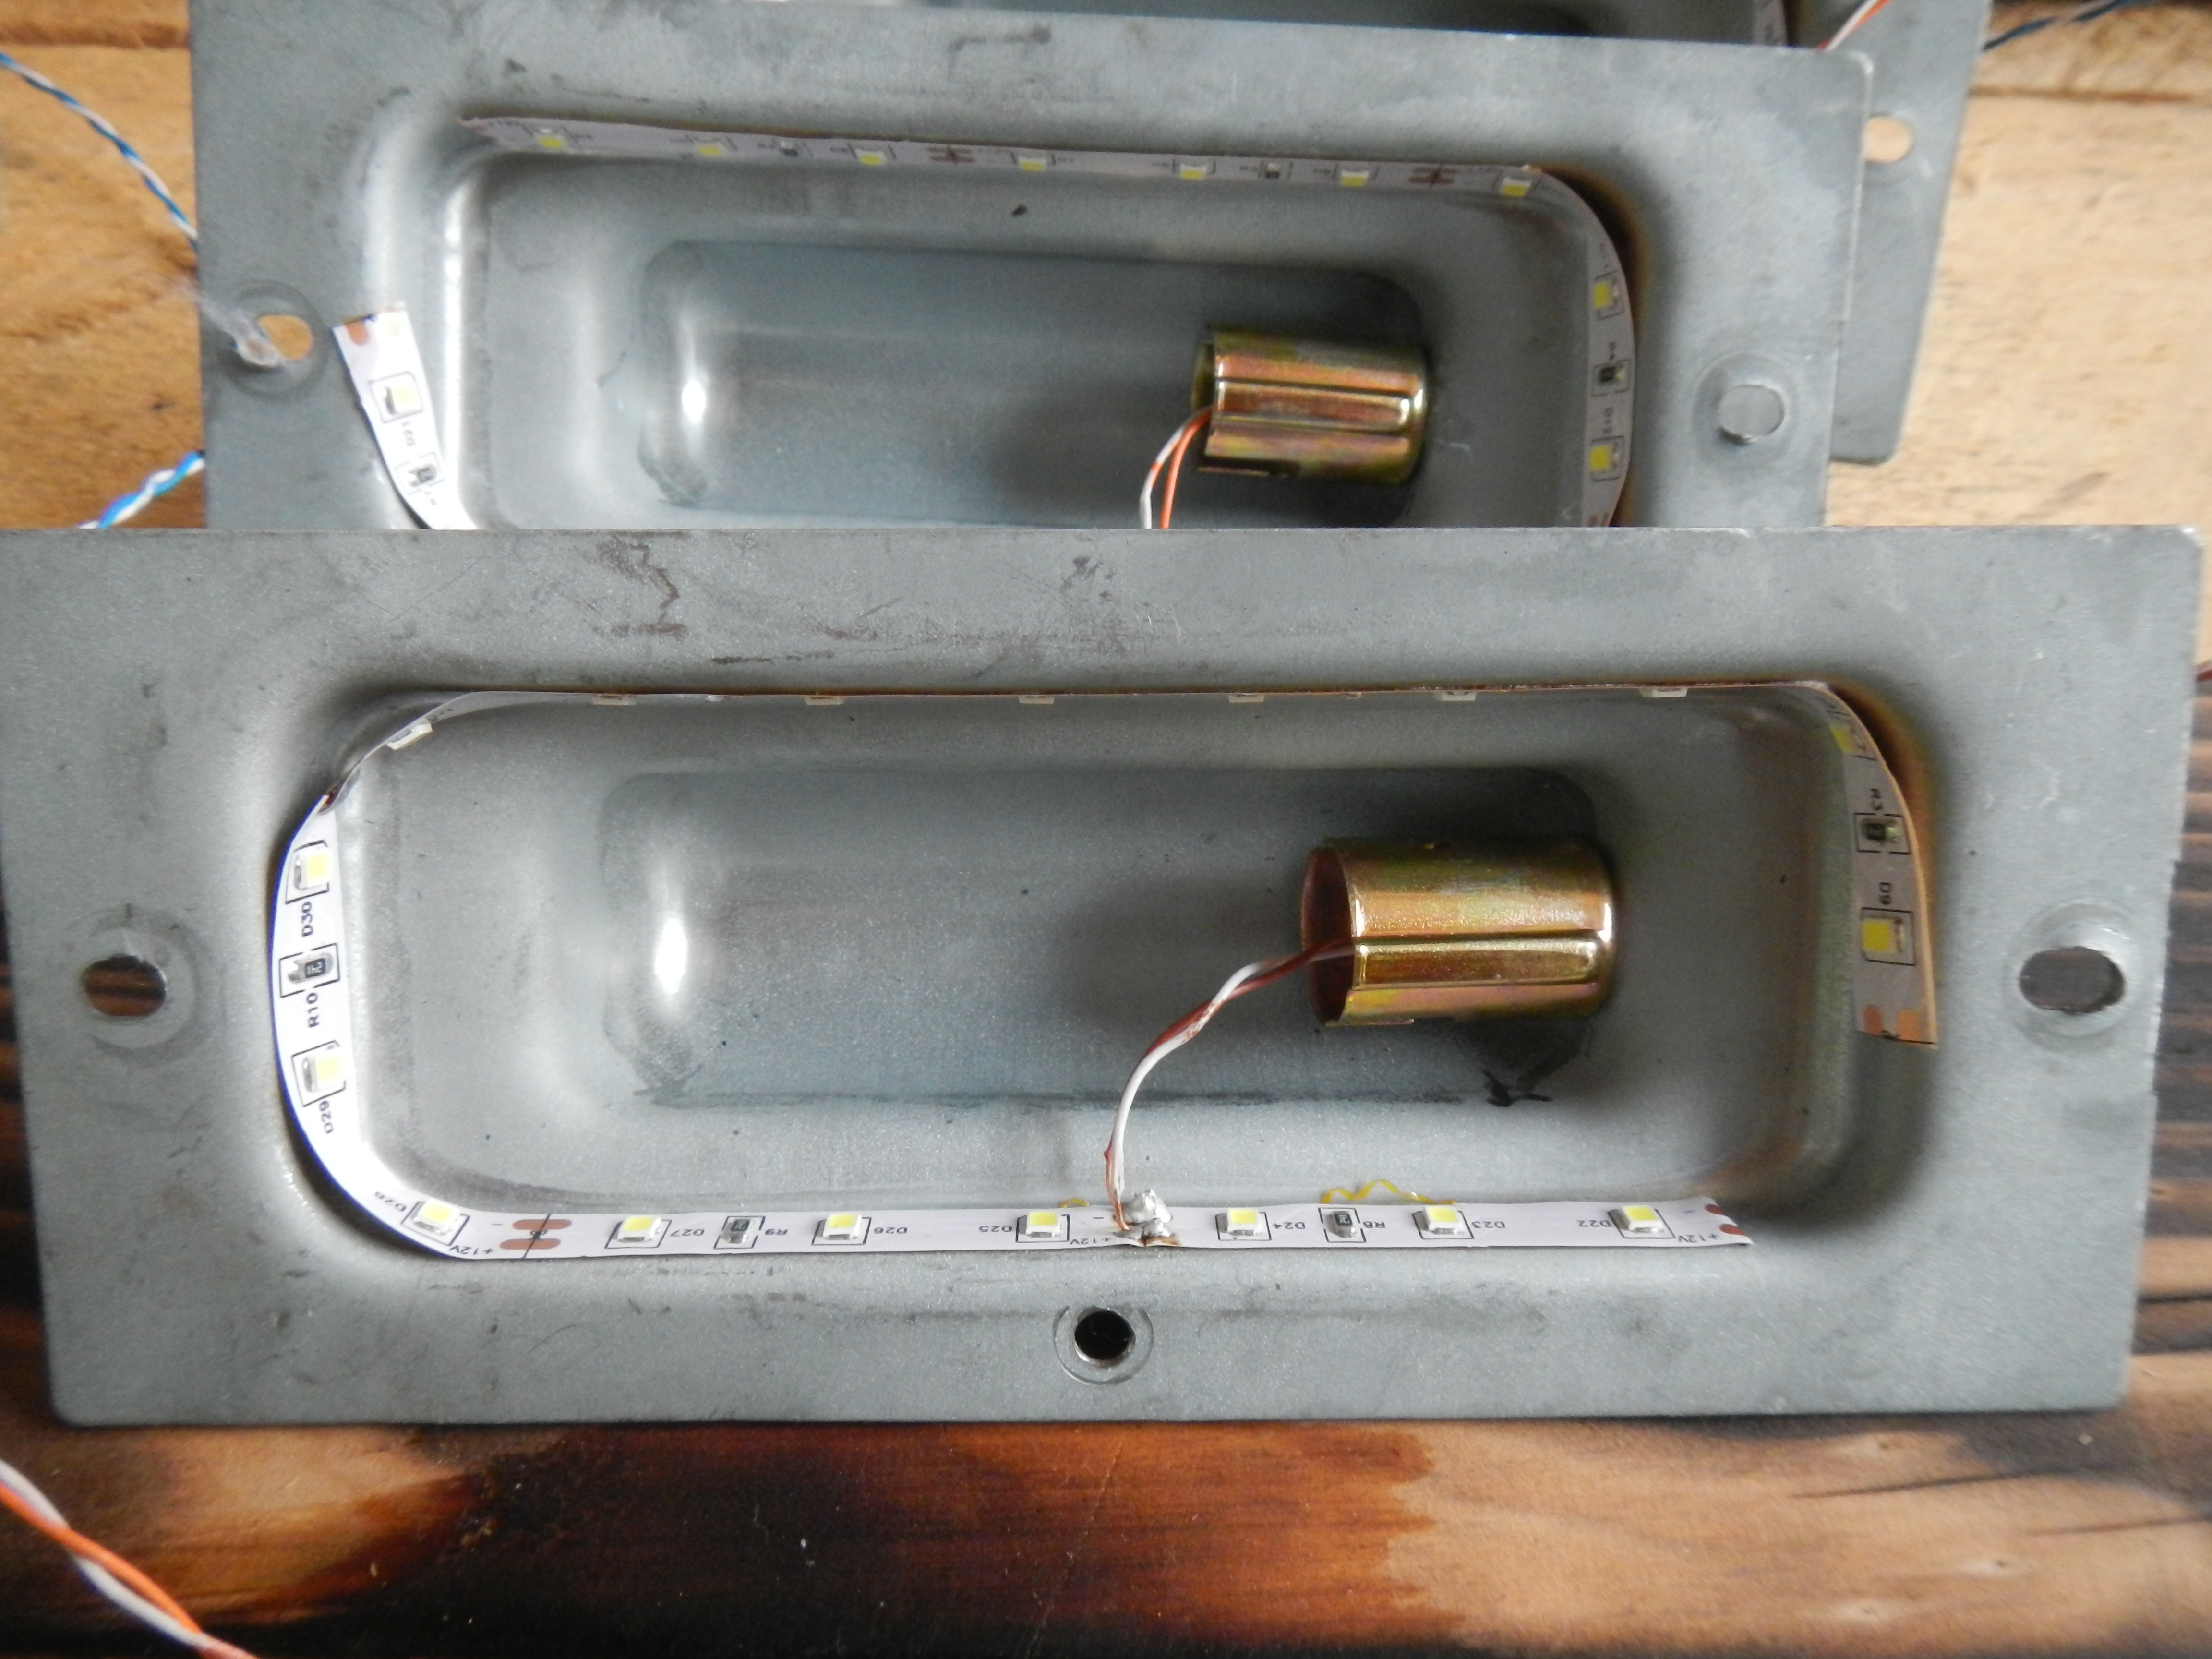
- The existing light enclosures were rewired with LED strips
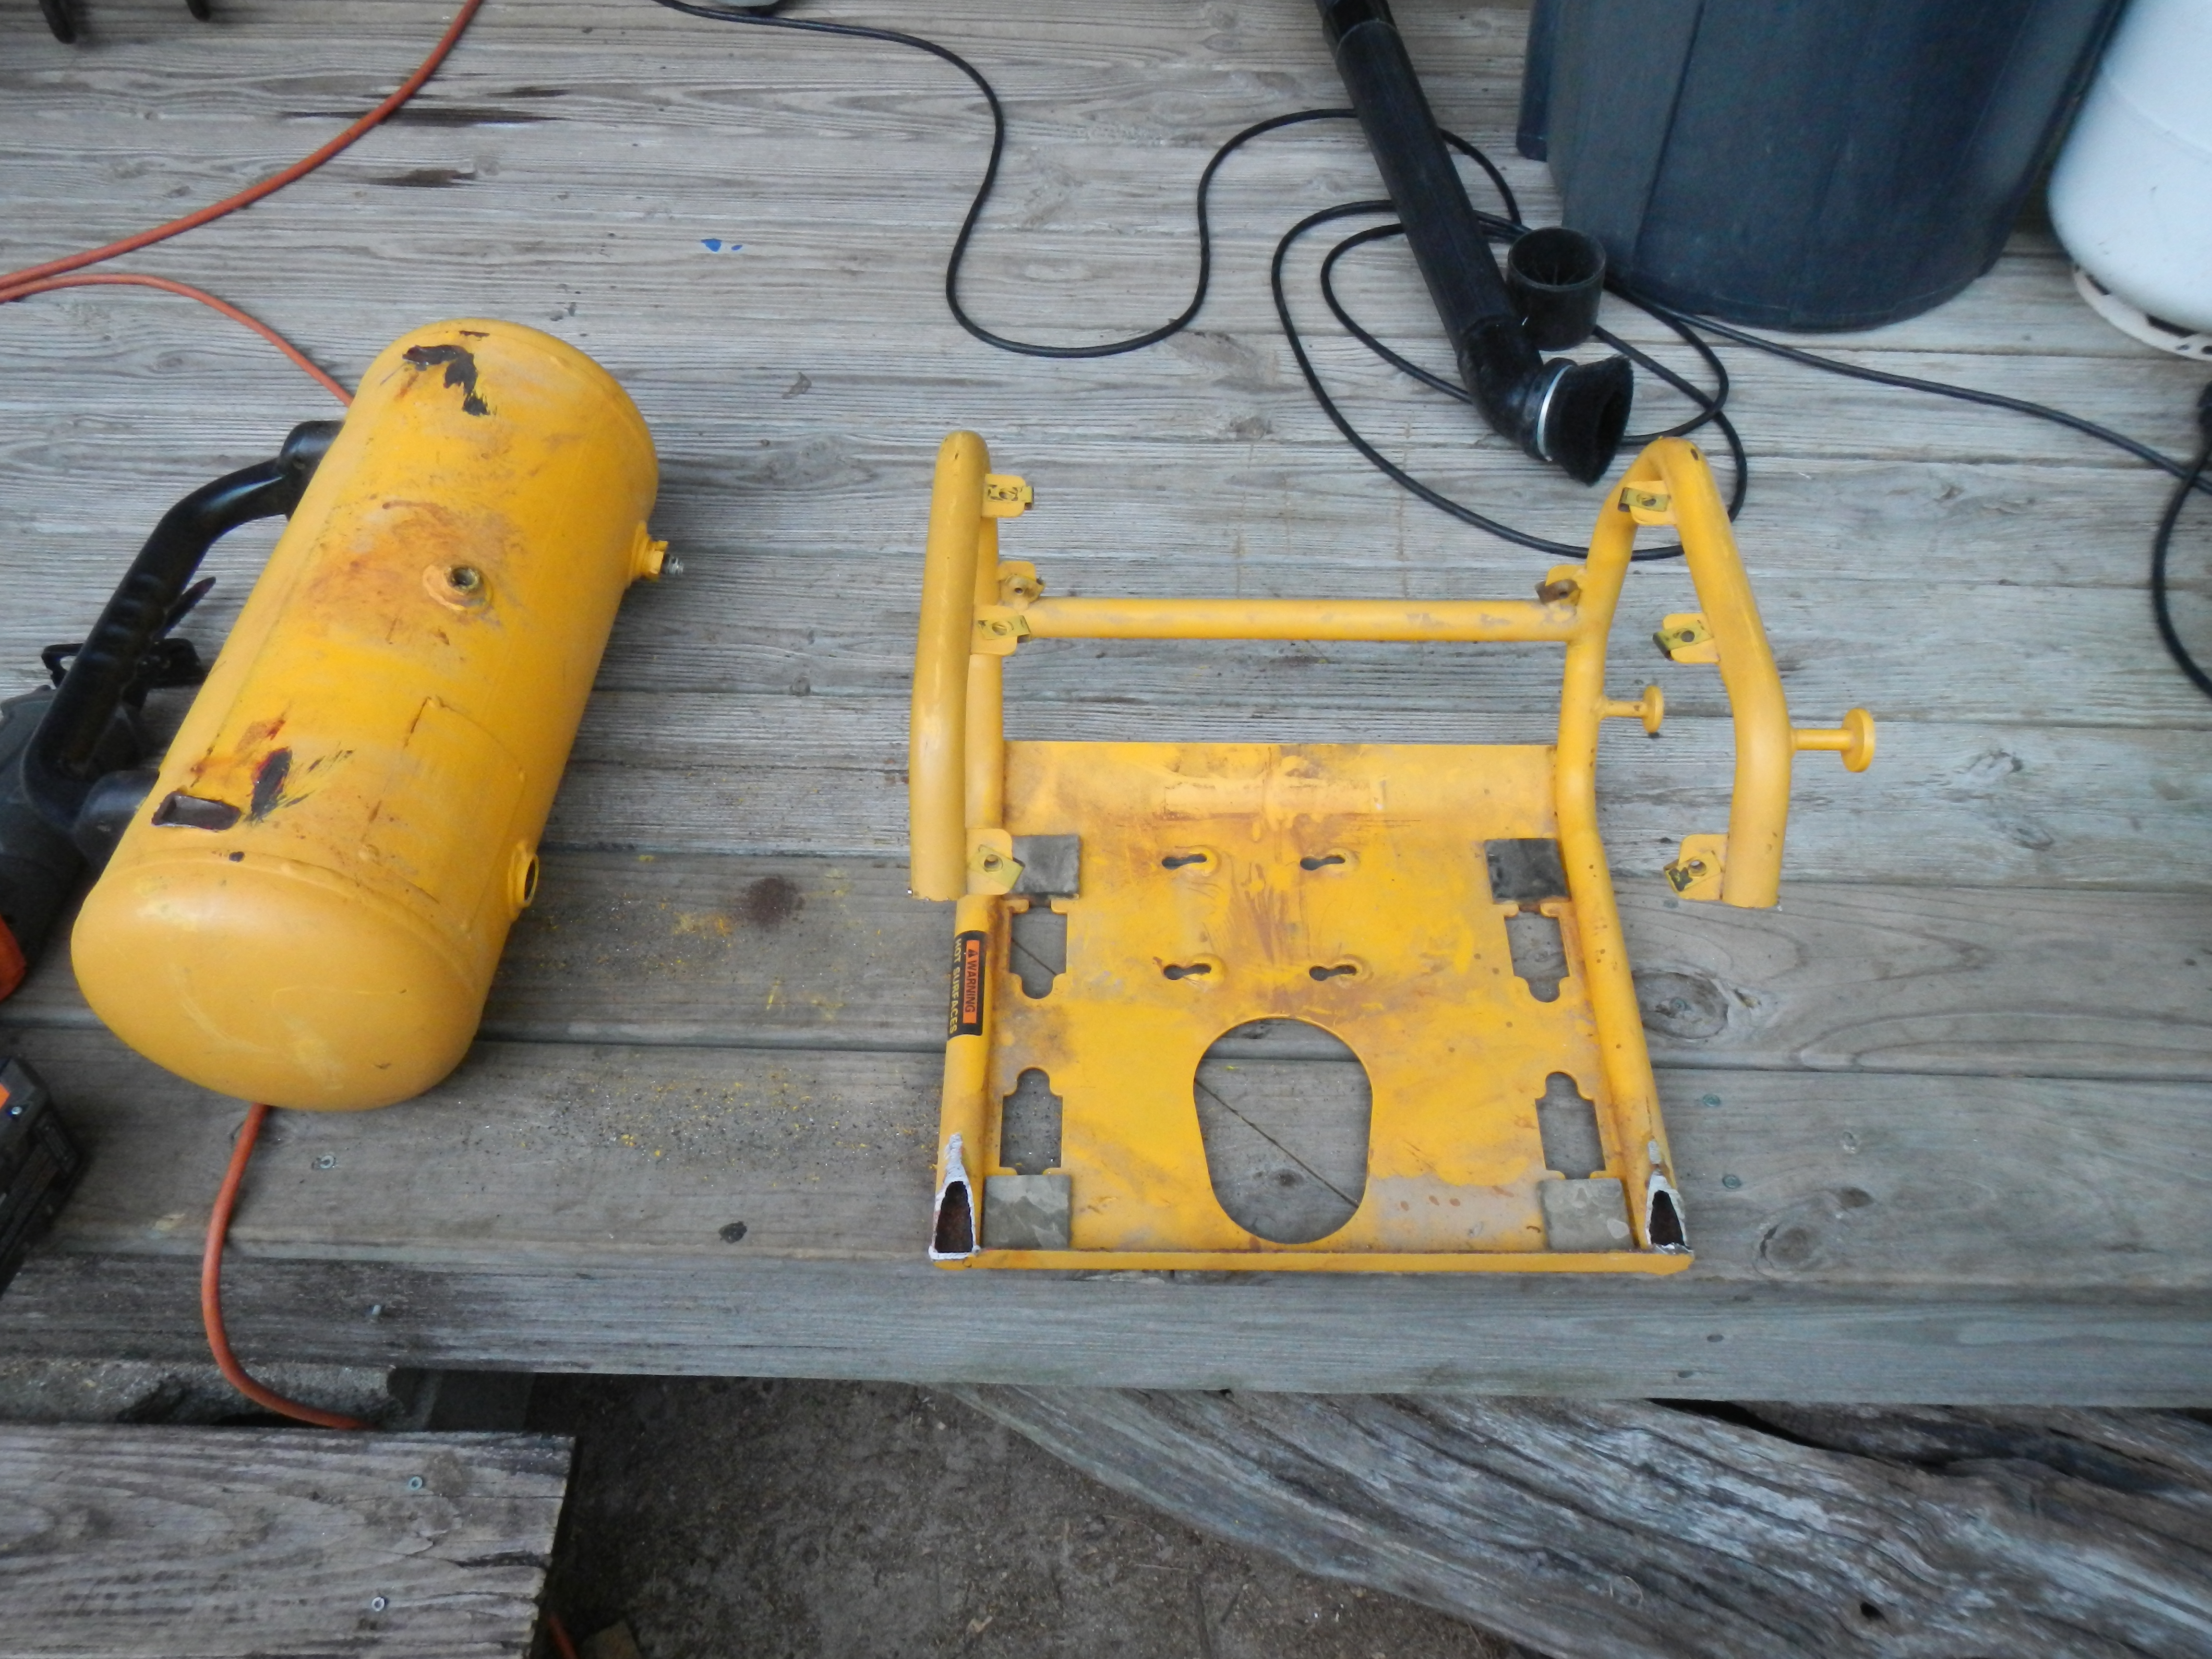
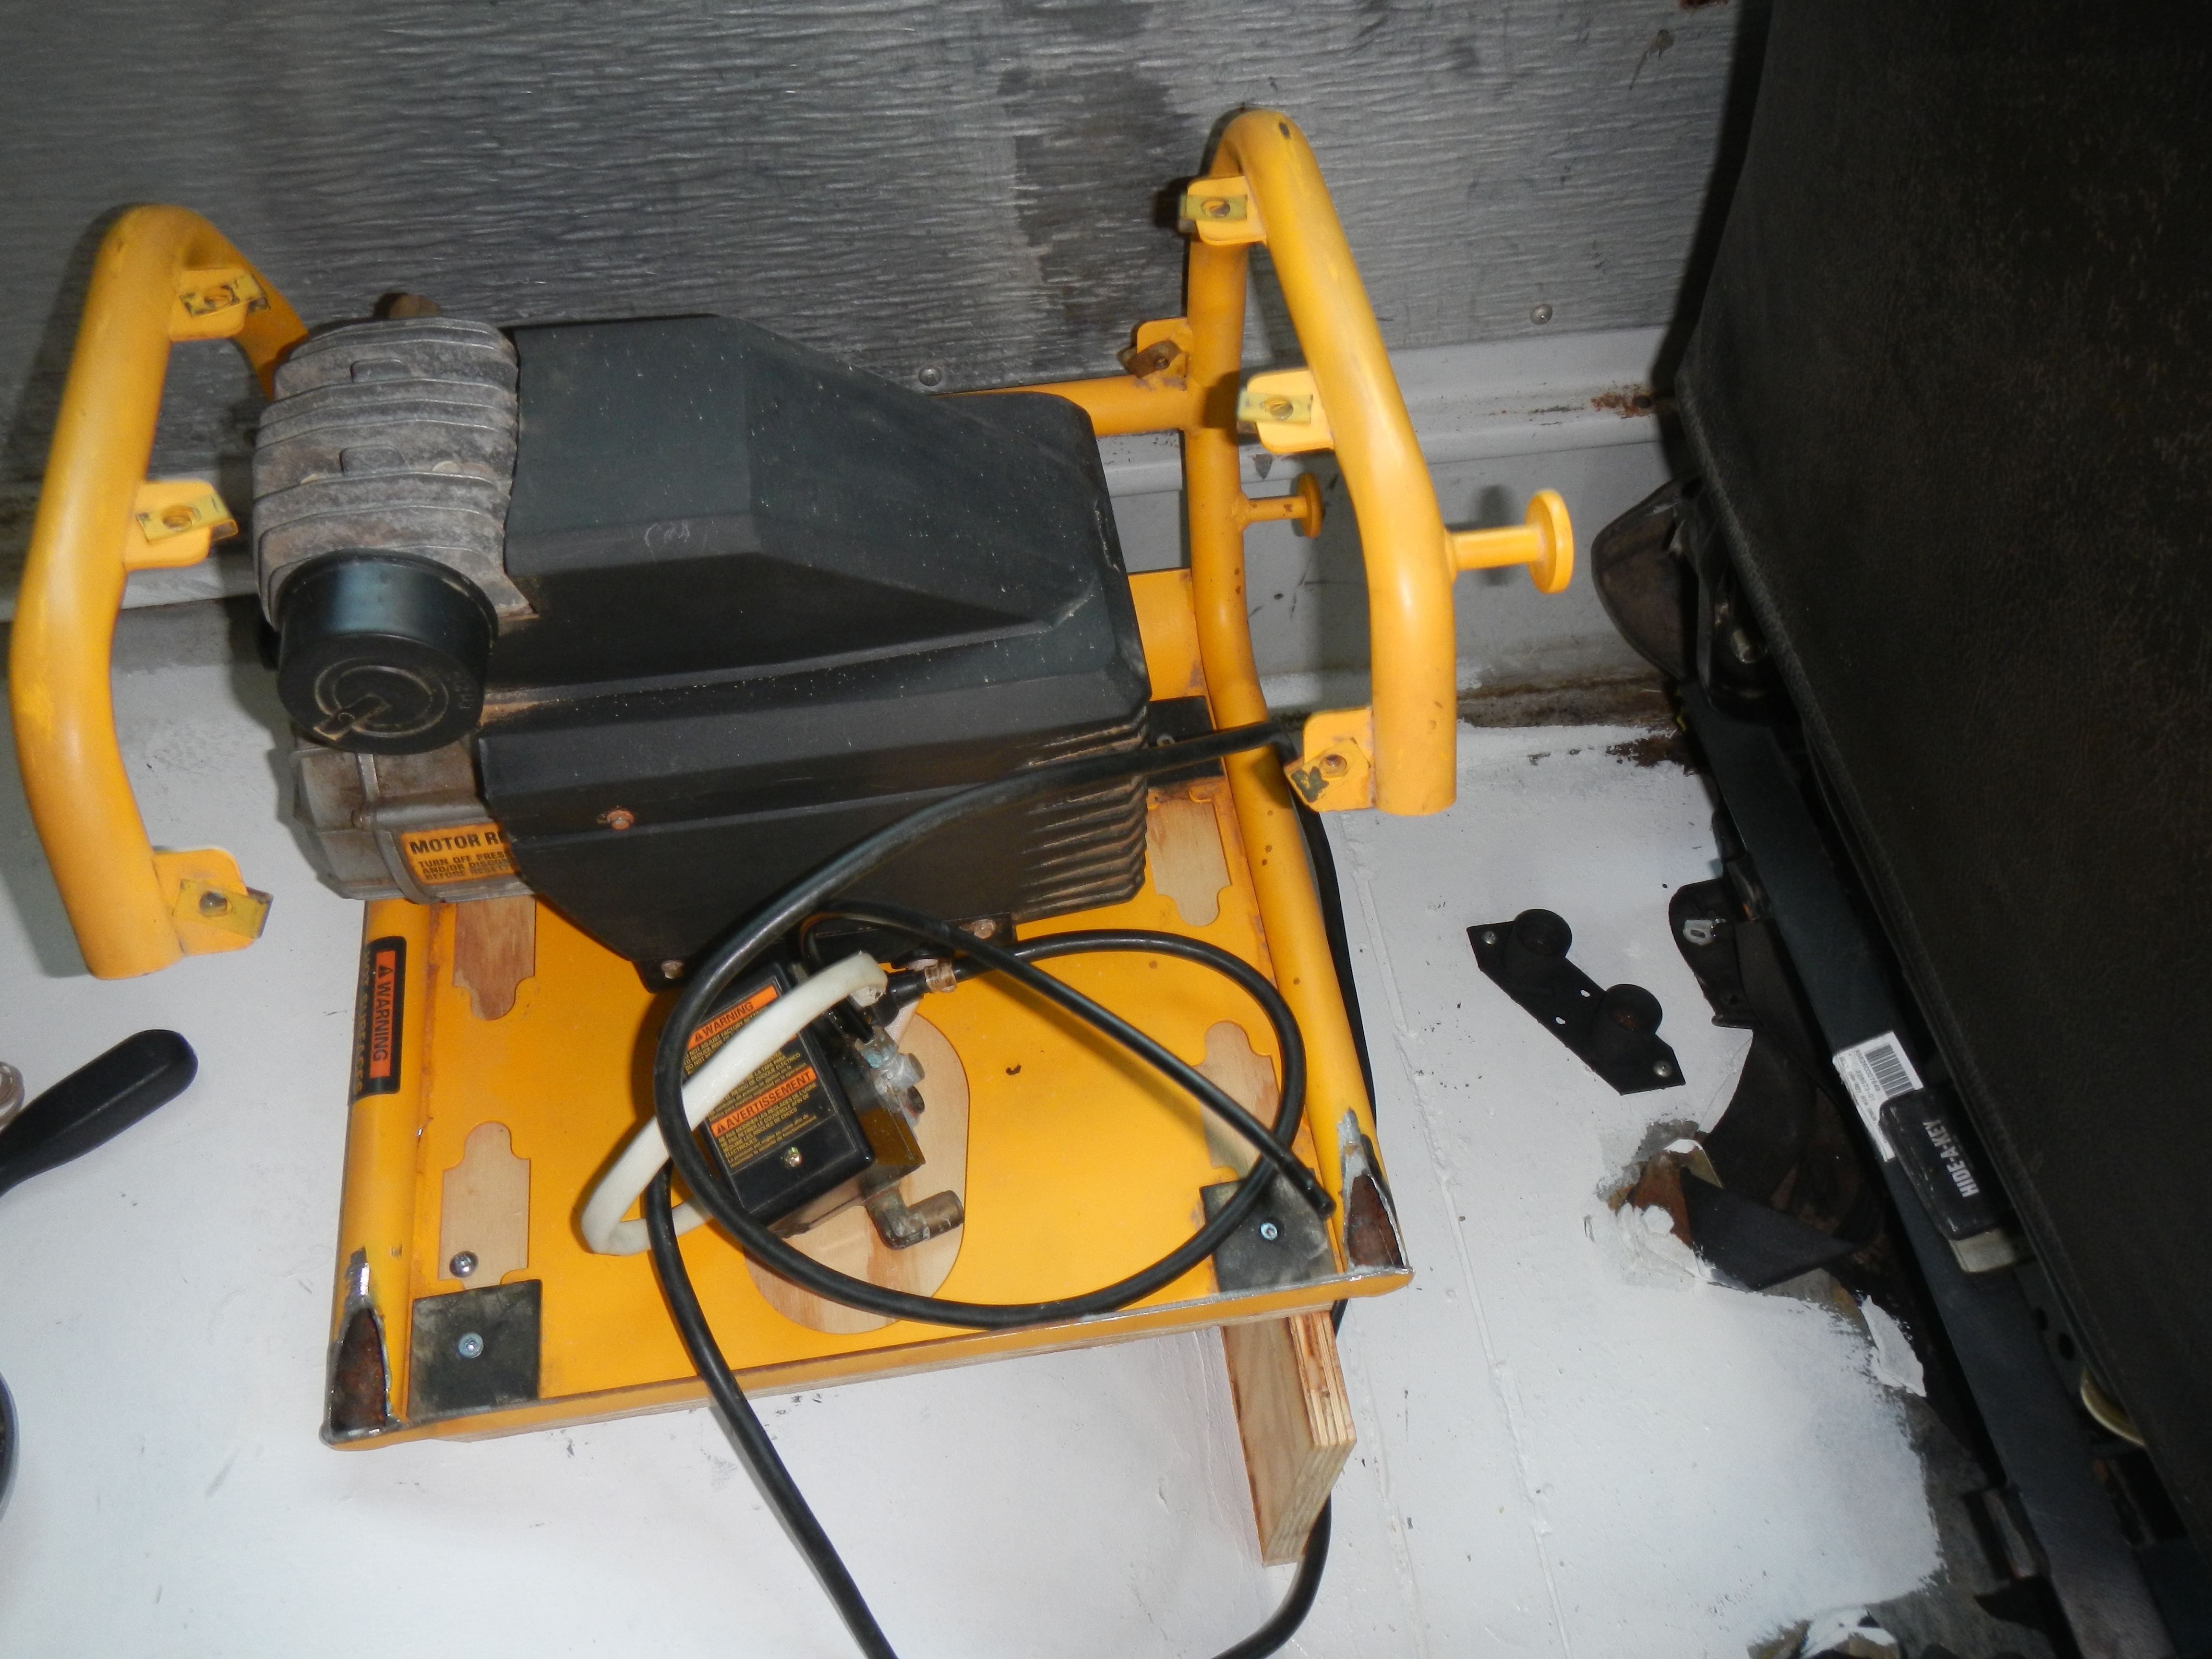
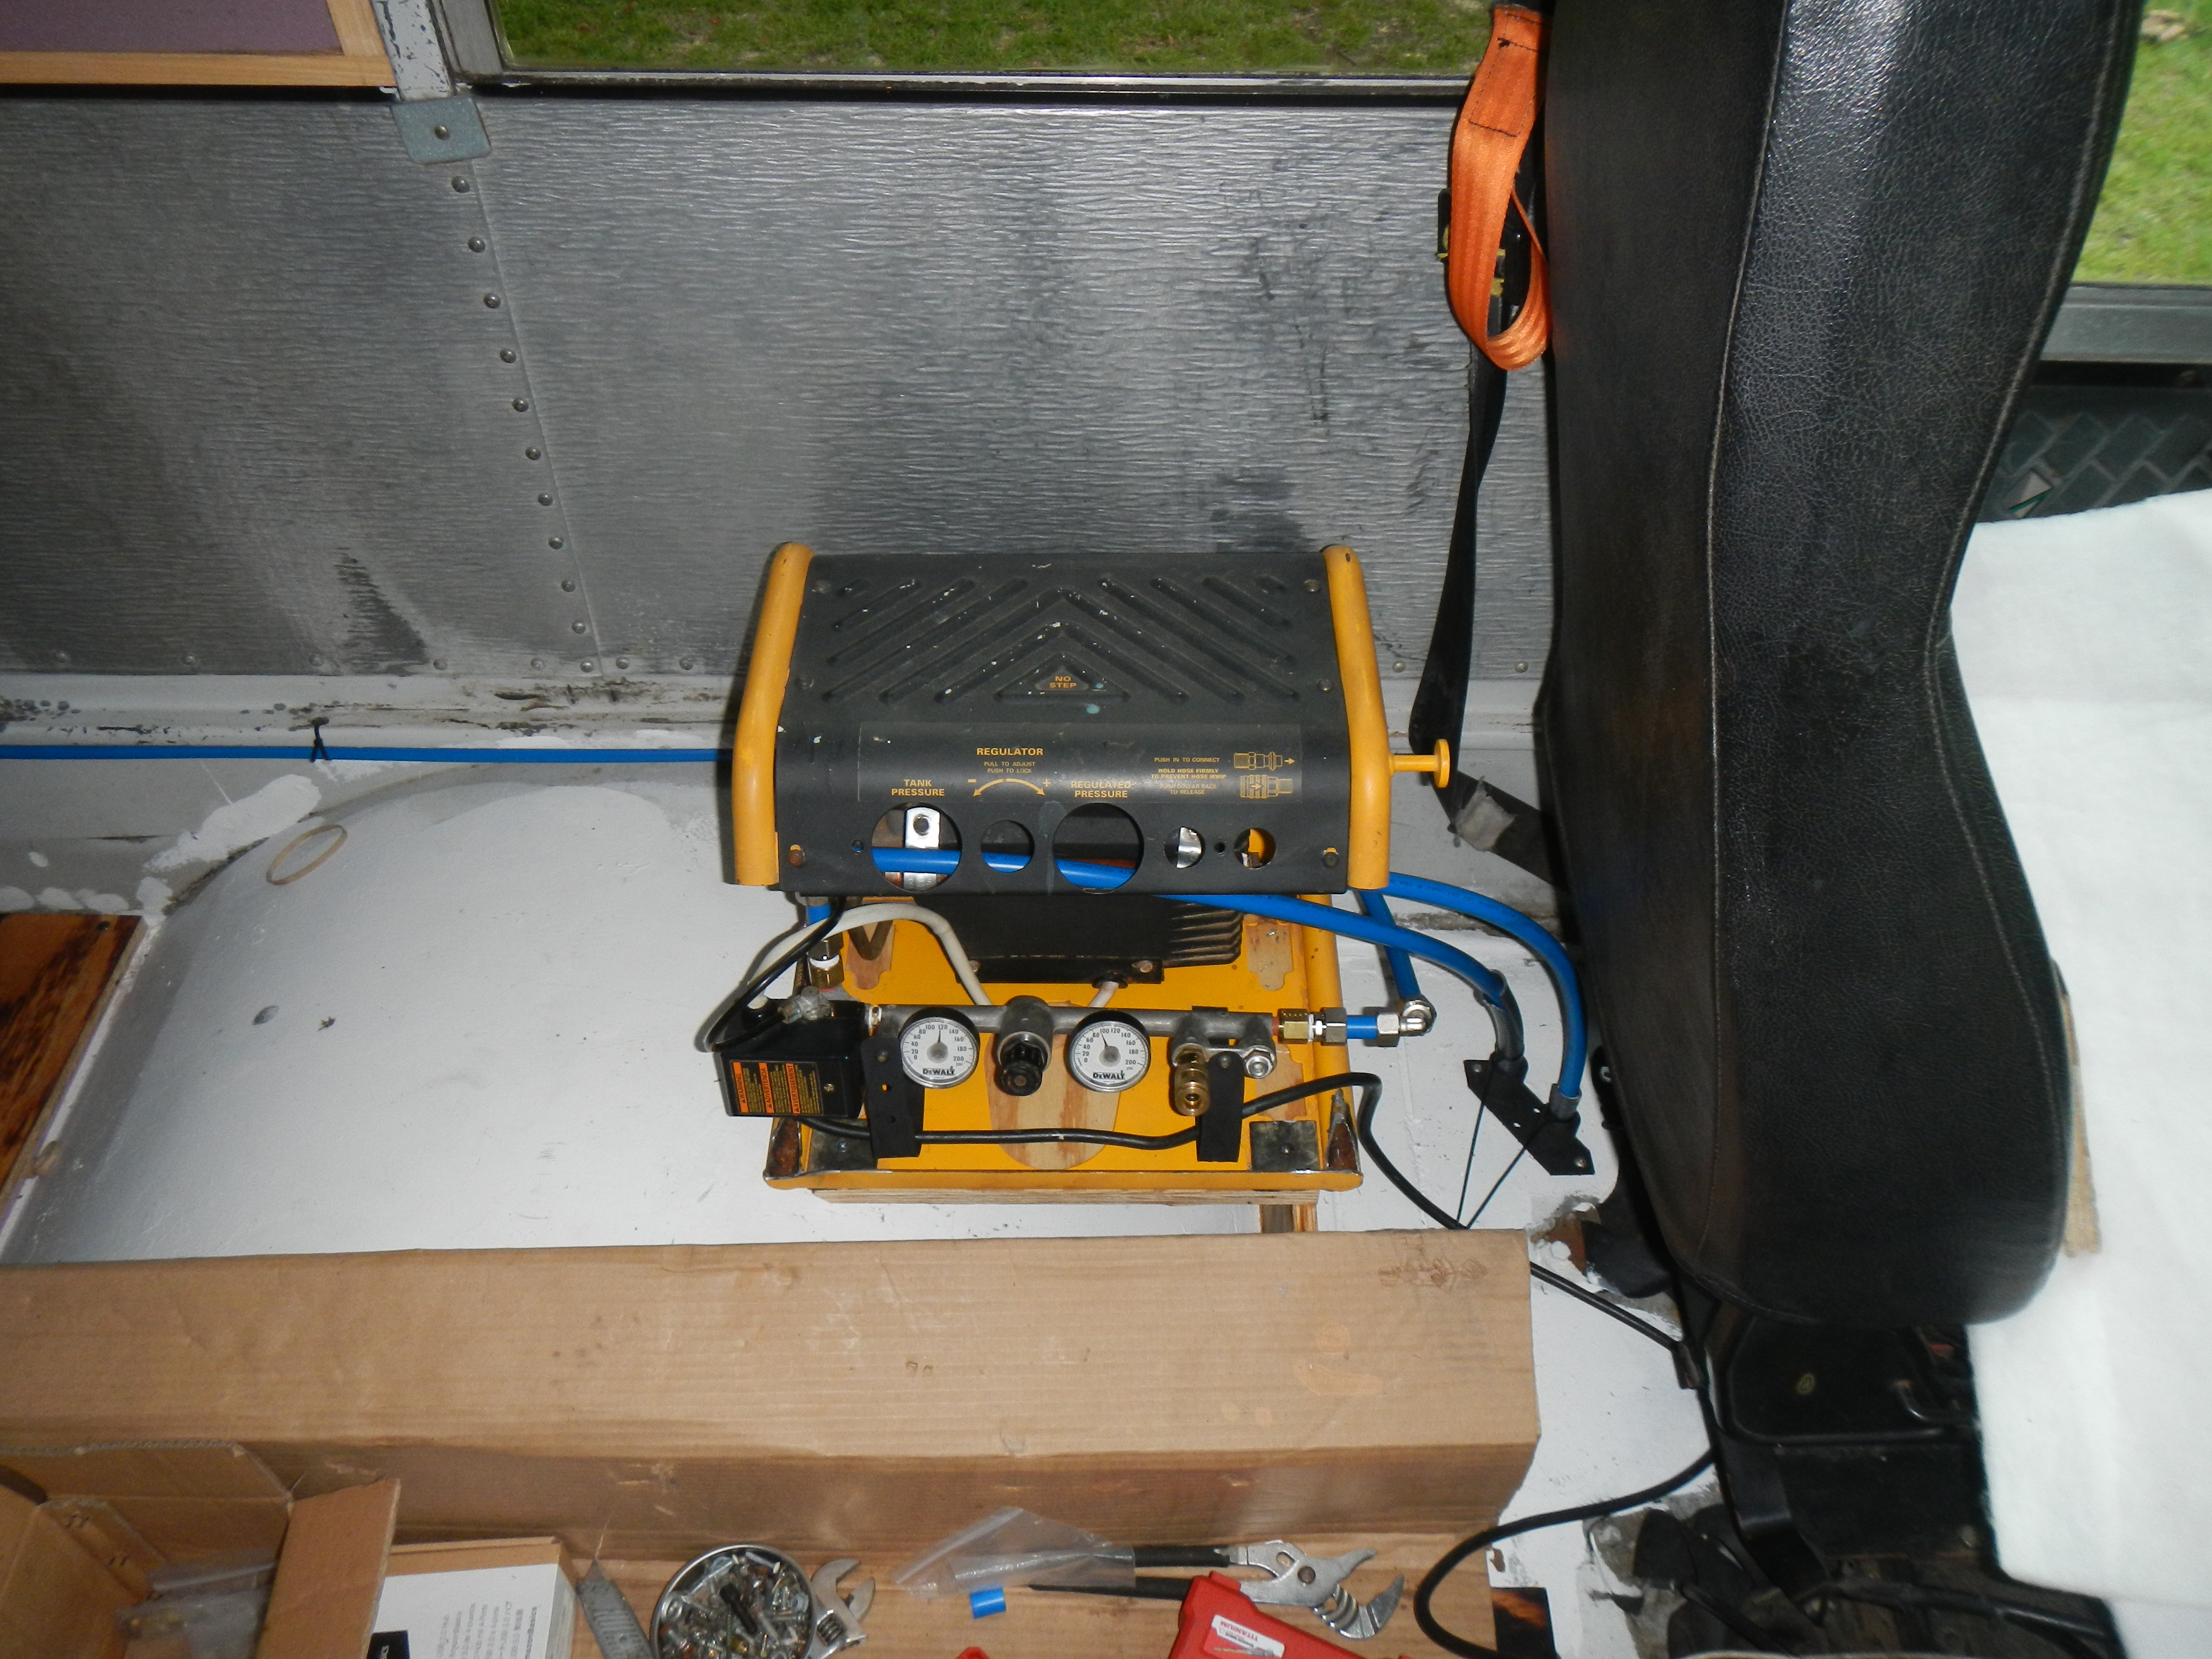
- A re-purposed electric air compressor was plumbed into the bus air dryer and air from the under body tanks was piped to the interior.
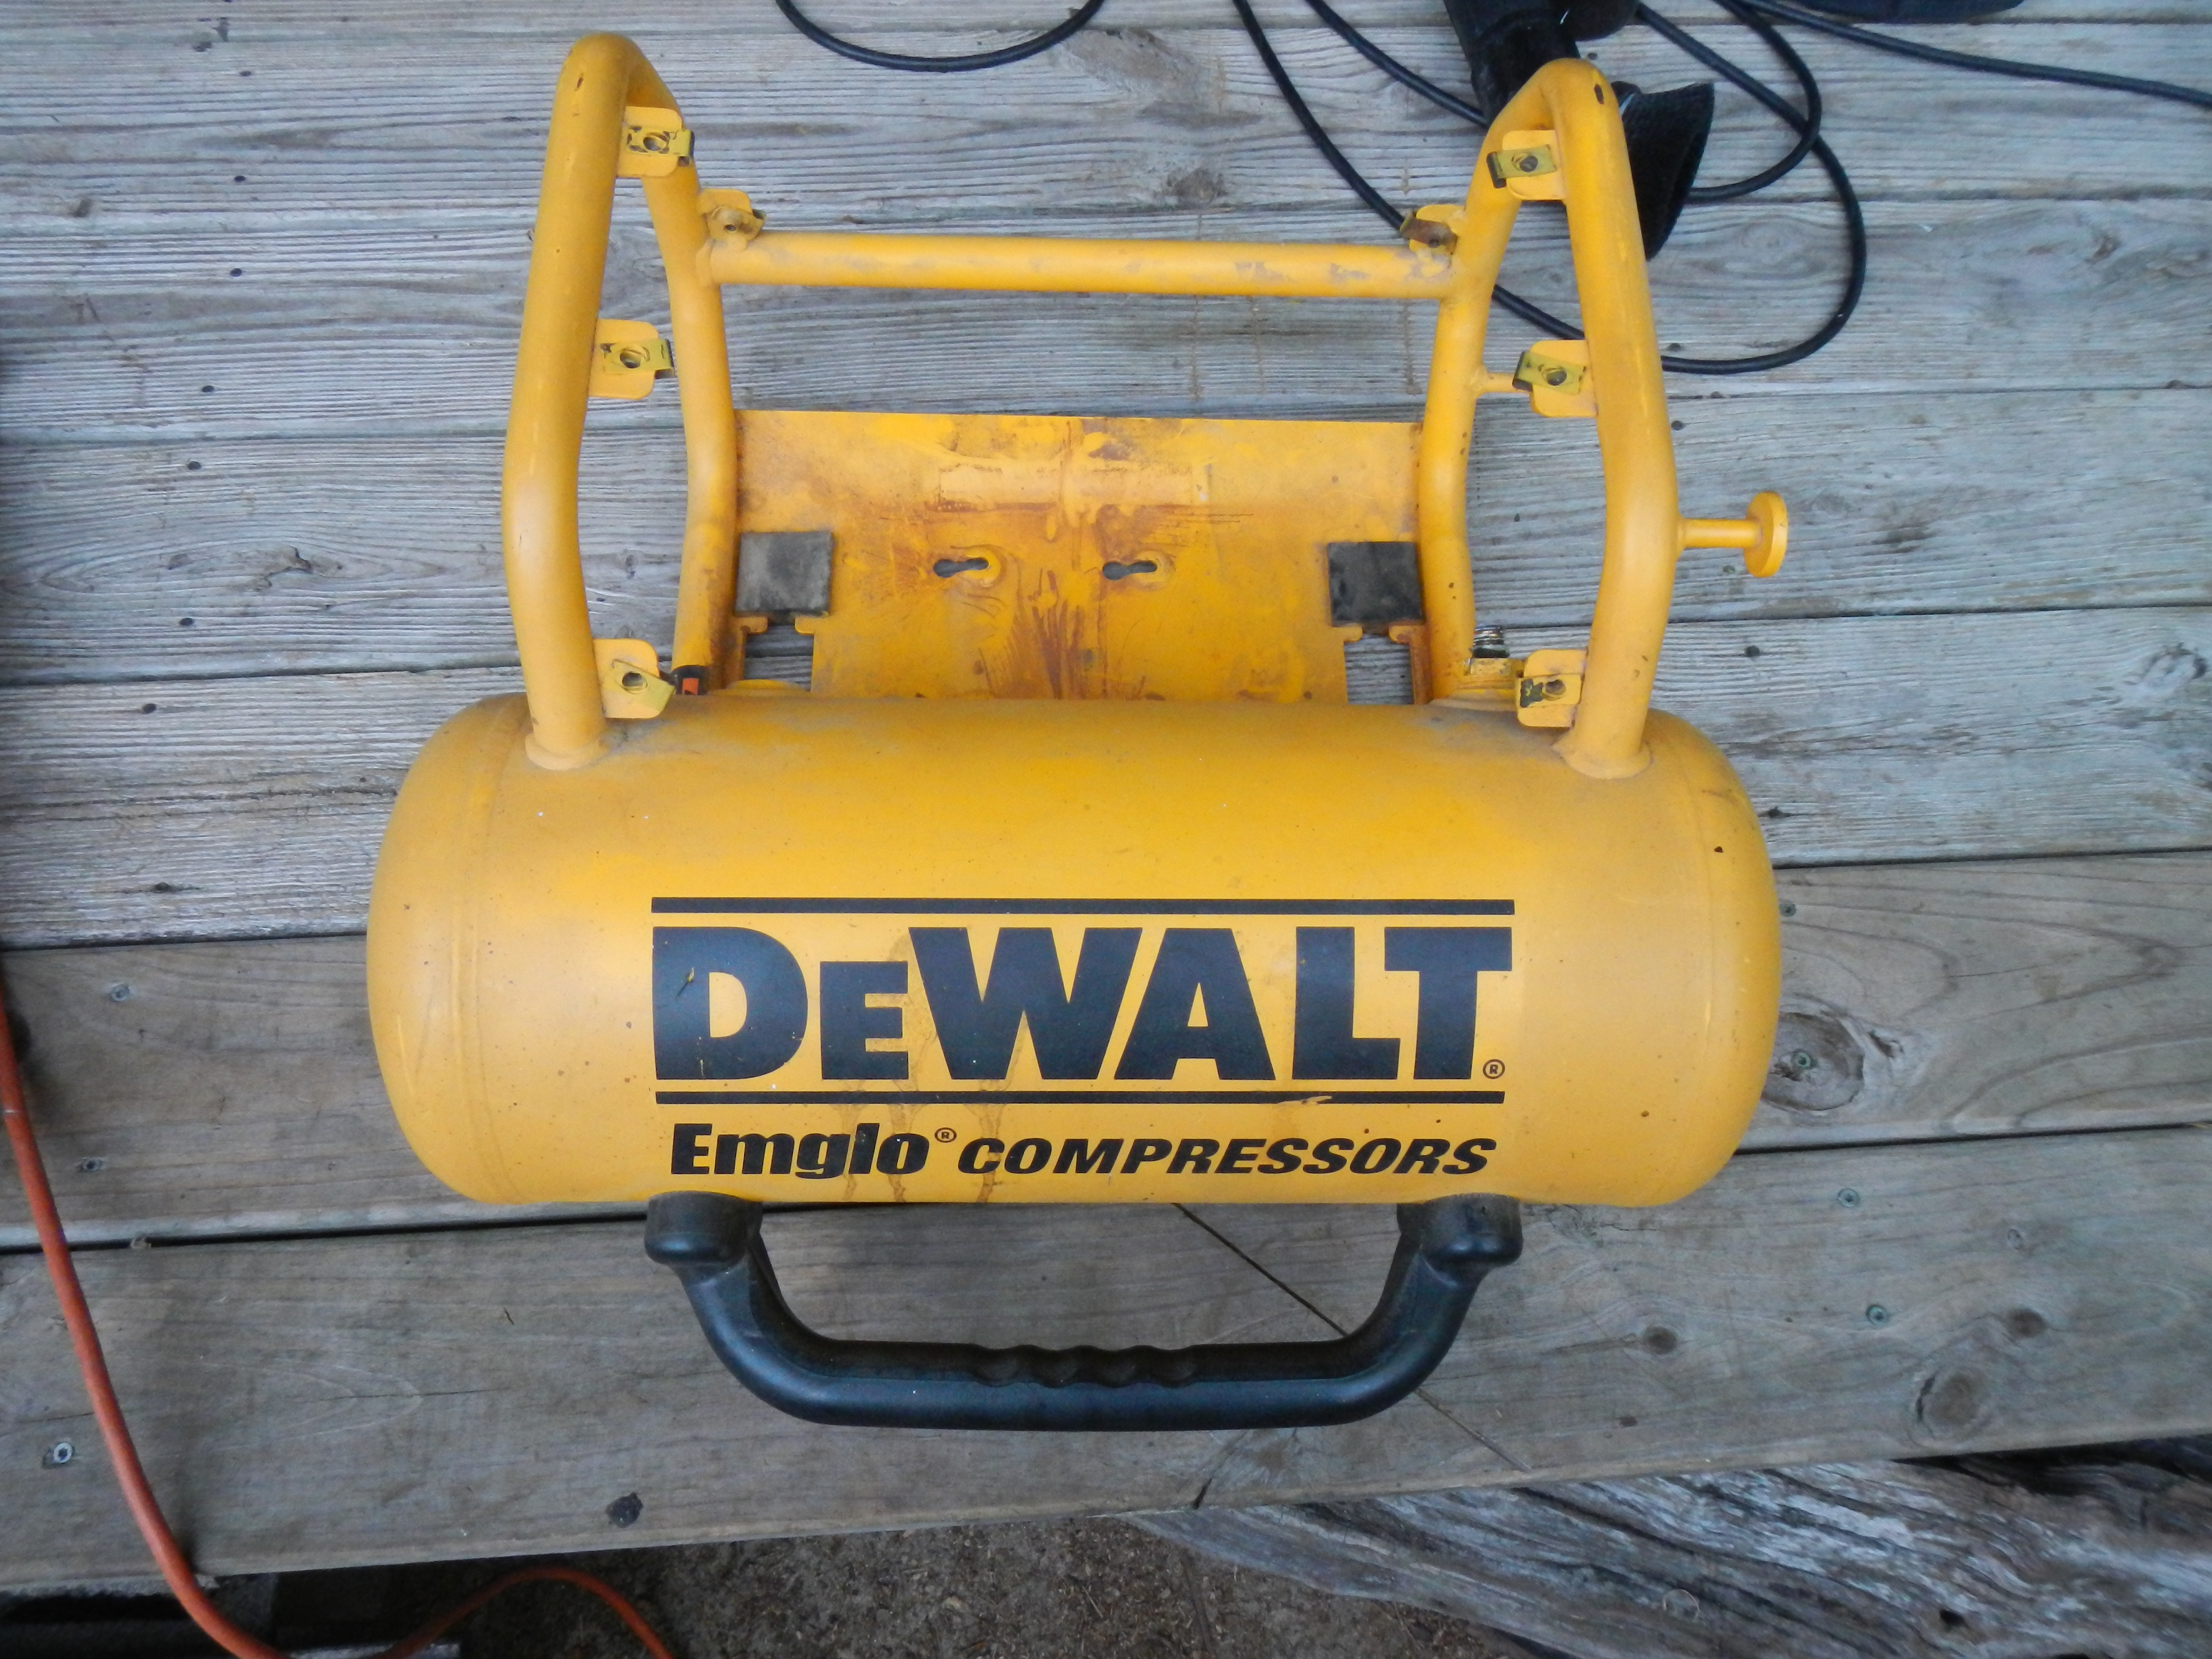
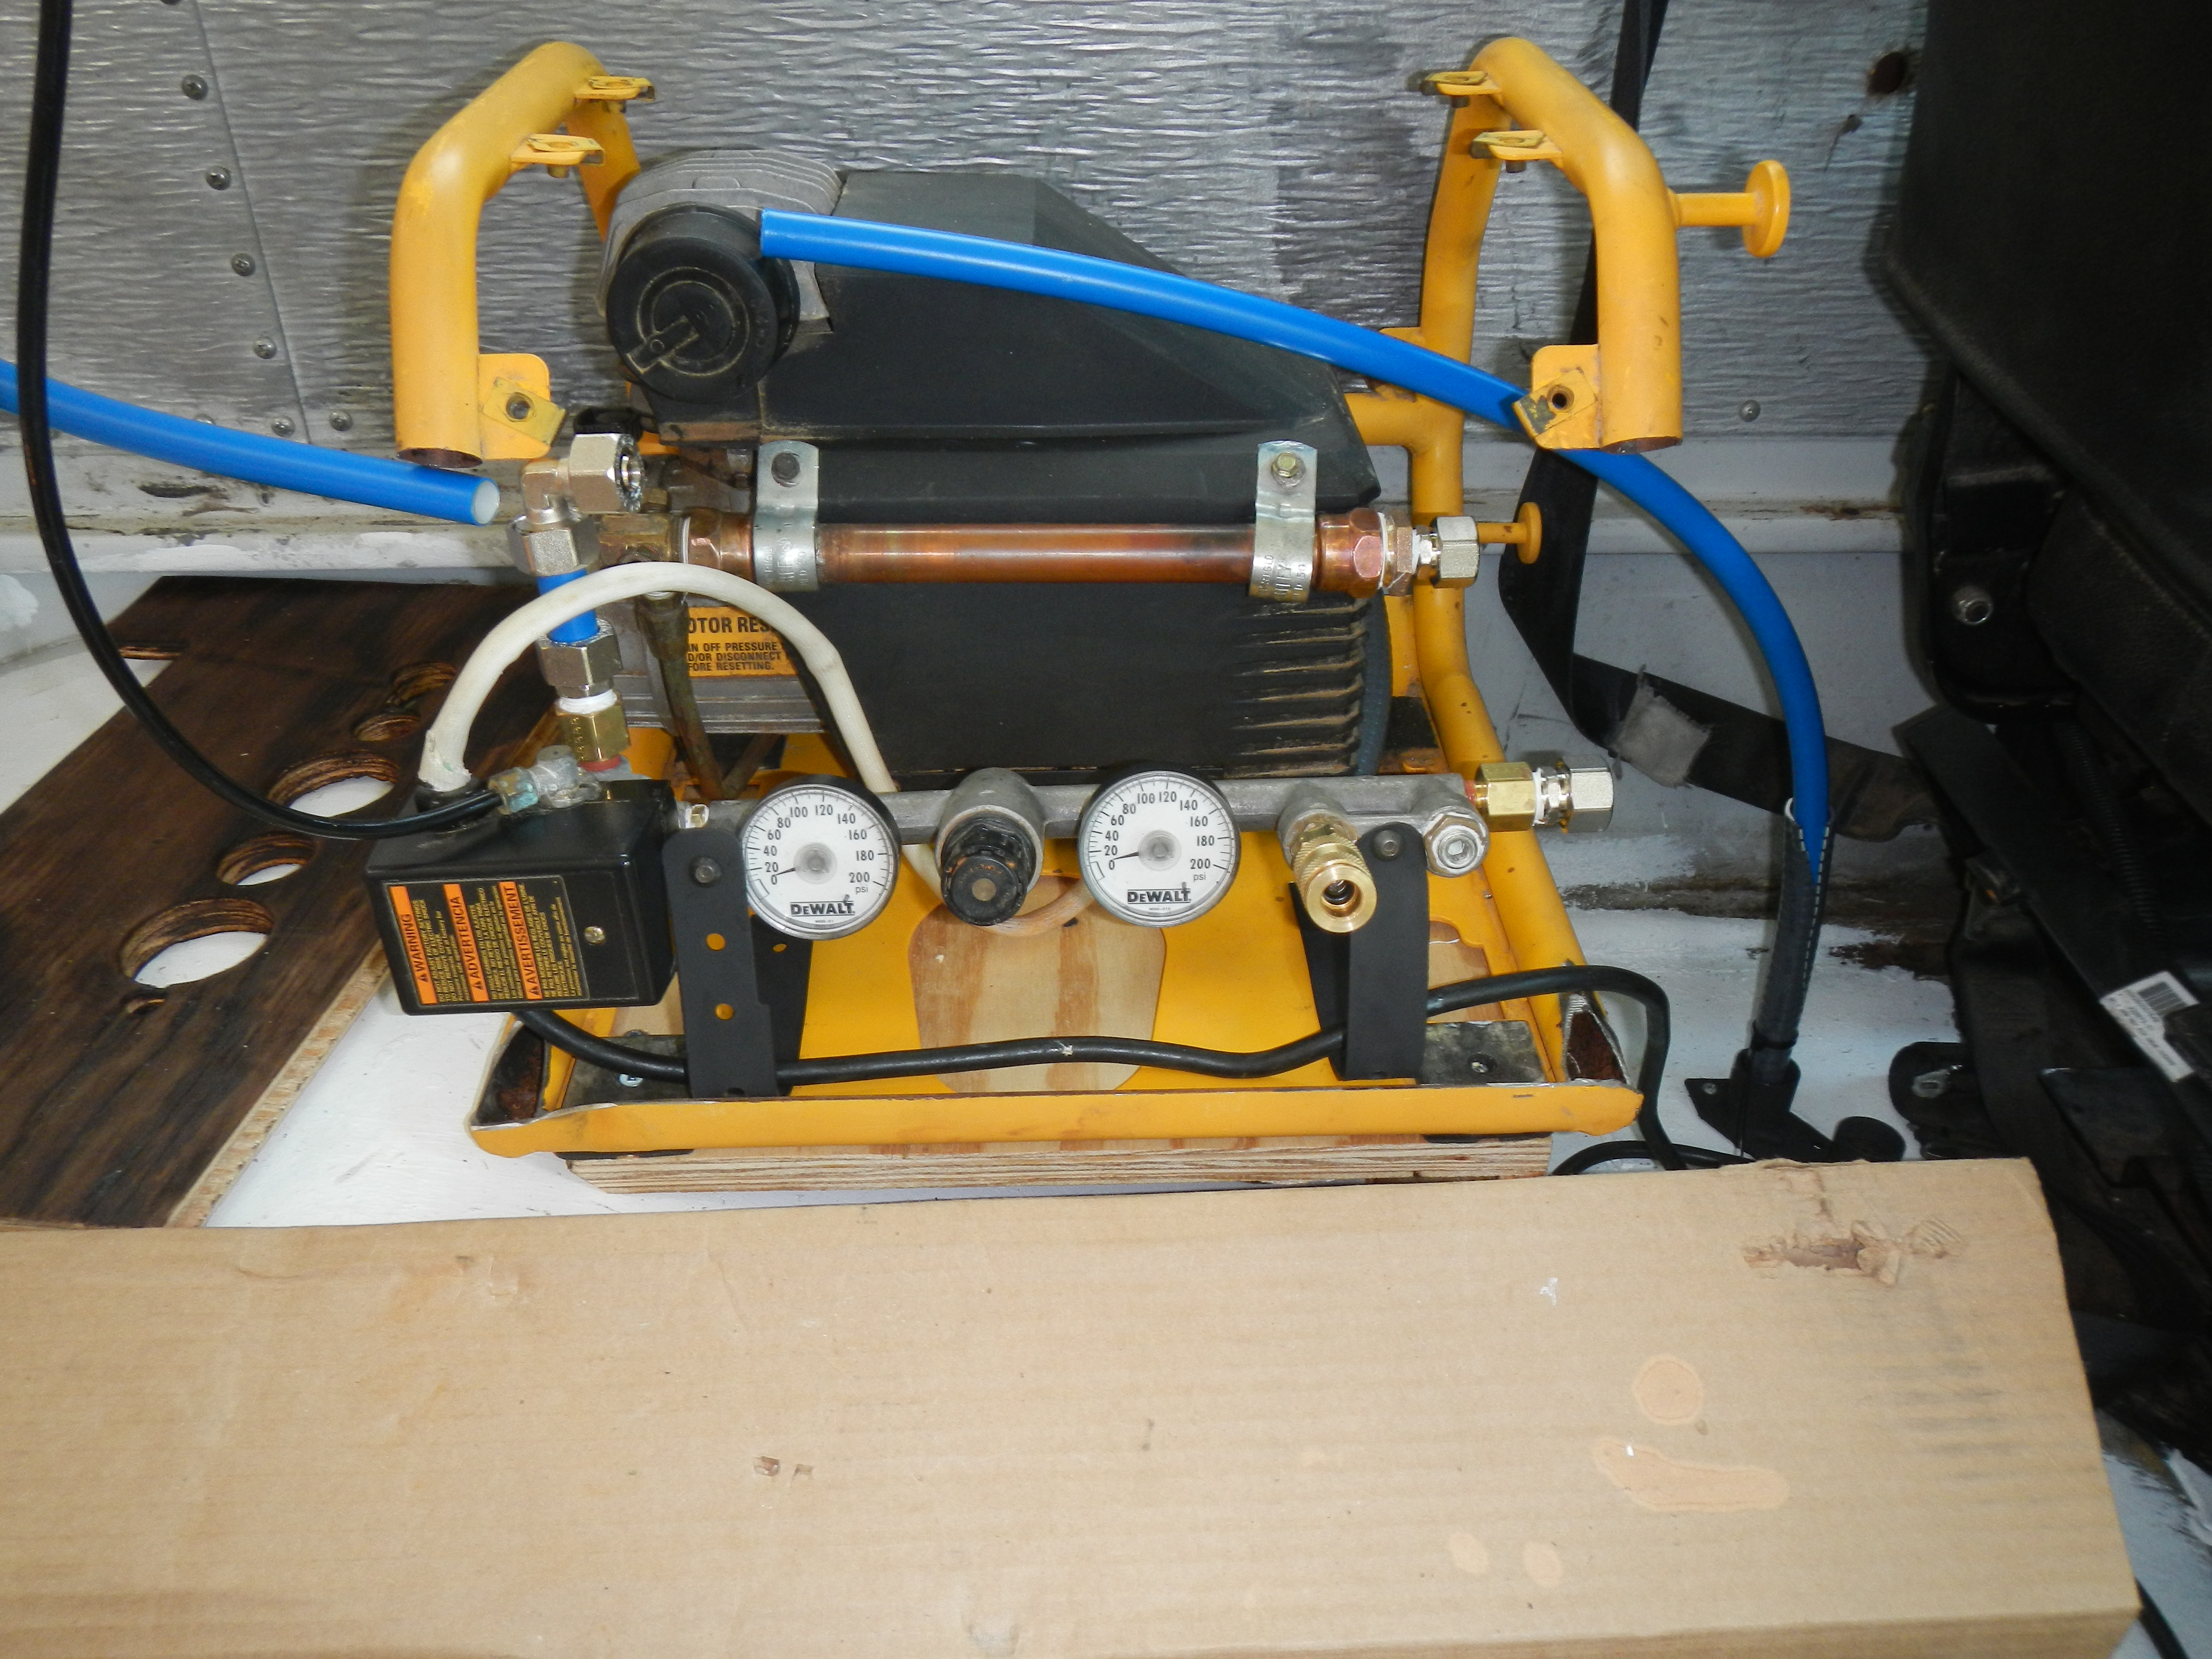
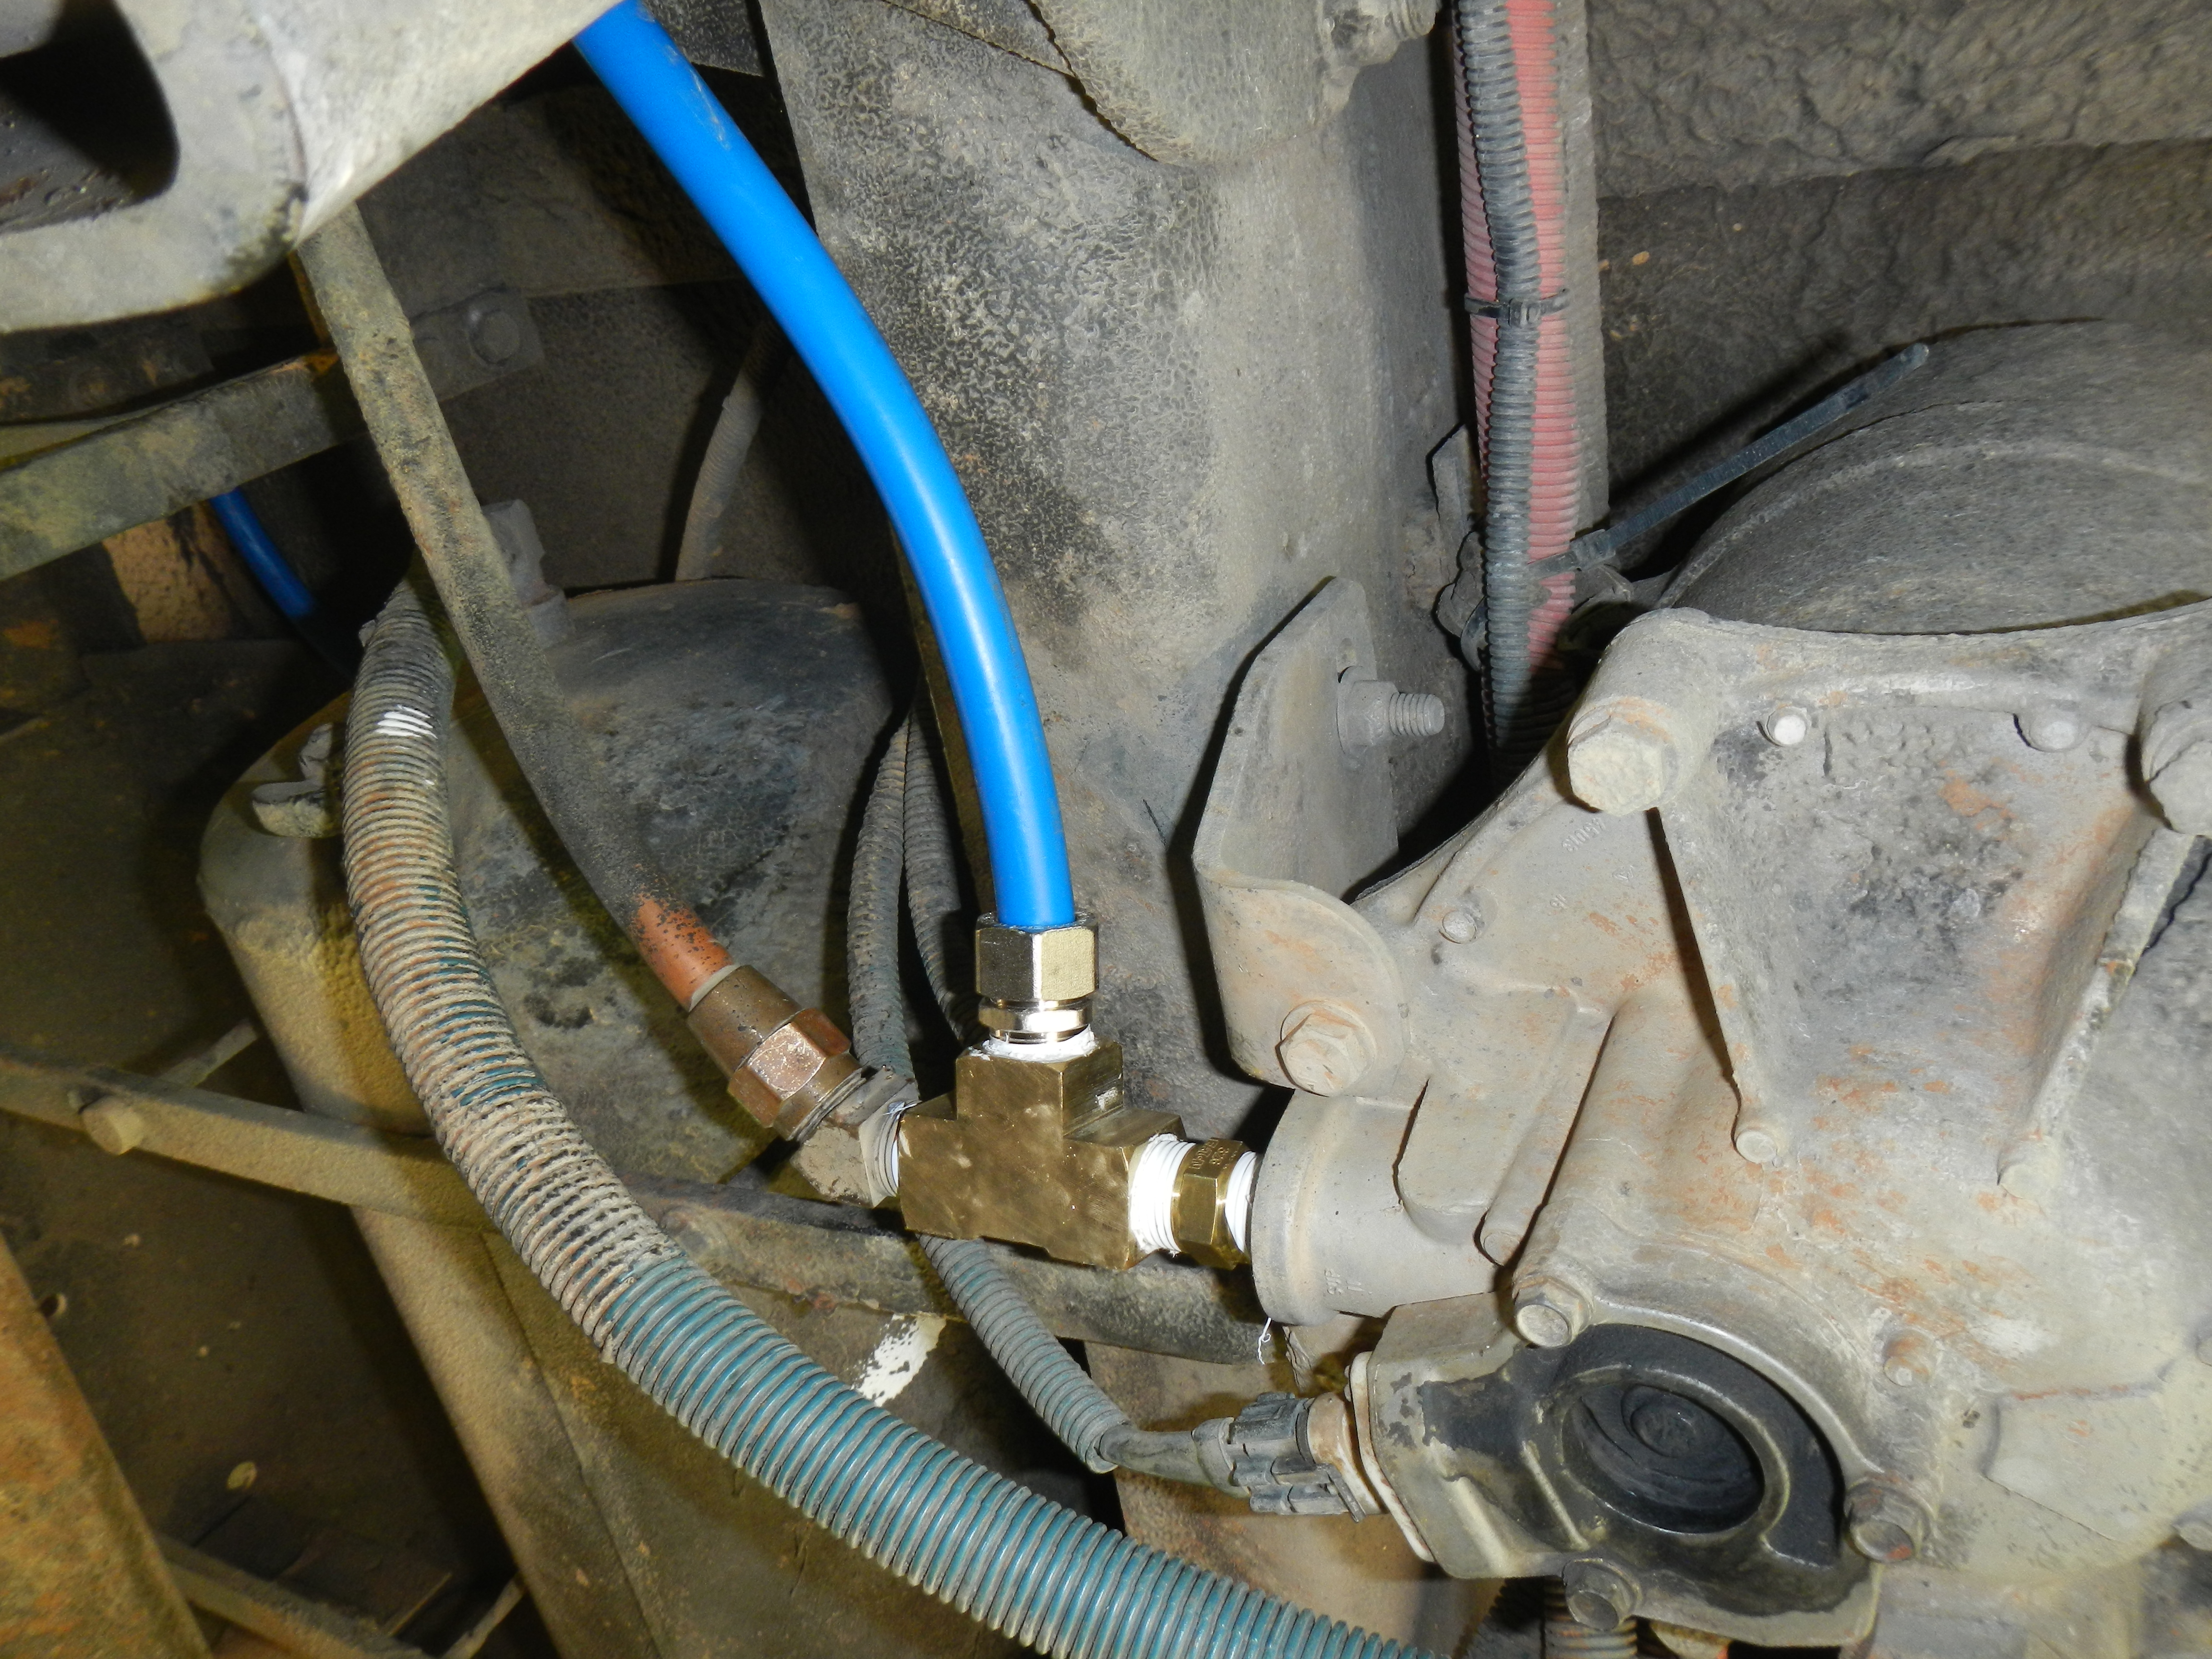
I originally considered running straight copper line from the compressor to the air dryer as that would be best practice, but this is a pretty long run with some obnoxious routing, and the line I’m using is made of aluminum sandwiched between HDPE so its pretty tough and does an OK job of dissipating heat on its own. I’ve got a short run of copper at the compressor end to aid in heat dissipation and the line runs steadily downhill until it gets to the air dryer, so I don’t anticipate any issues. Once I get the air dryer wired to the solar electric system (don’t want to have to turn the key on for the purge valve to be operable) I’ll subject it to stress testing and see if I can break anything.
Before we finished up for the day on Saturday, Karyn and Bob helped me move the electrical enclosure into its final location.
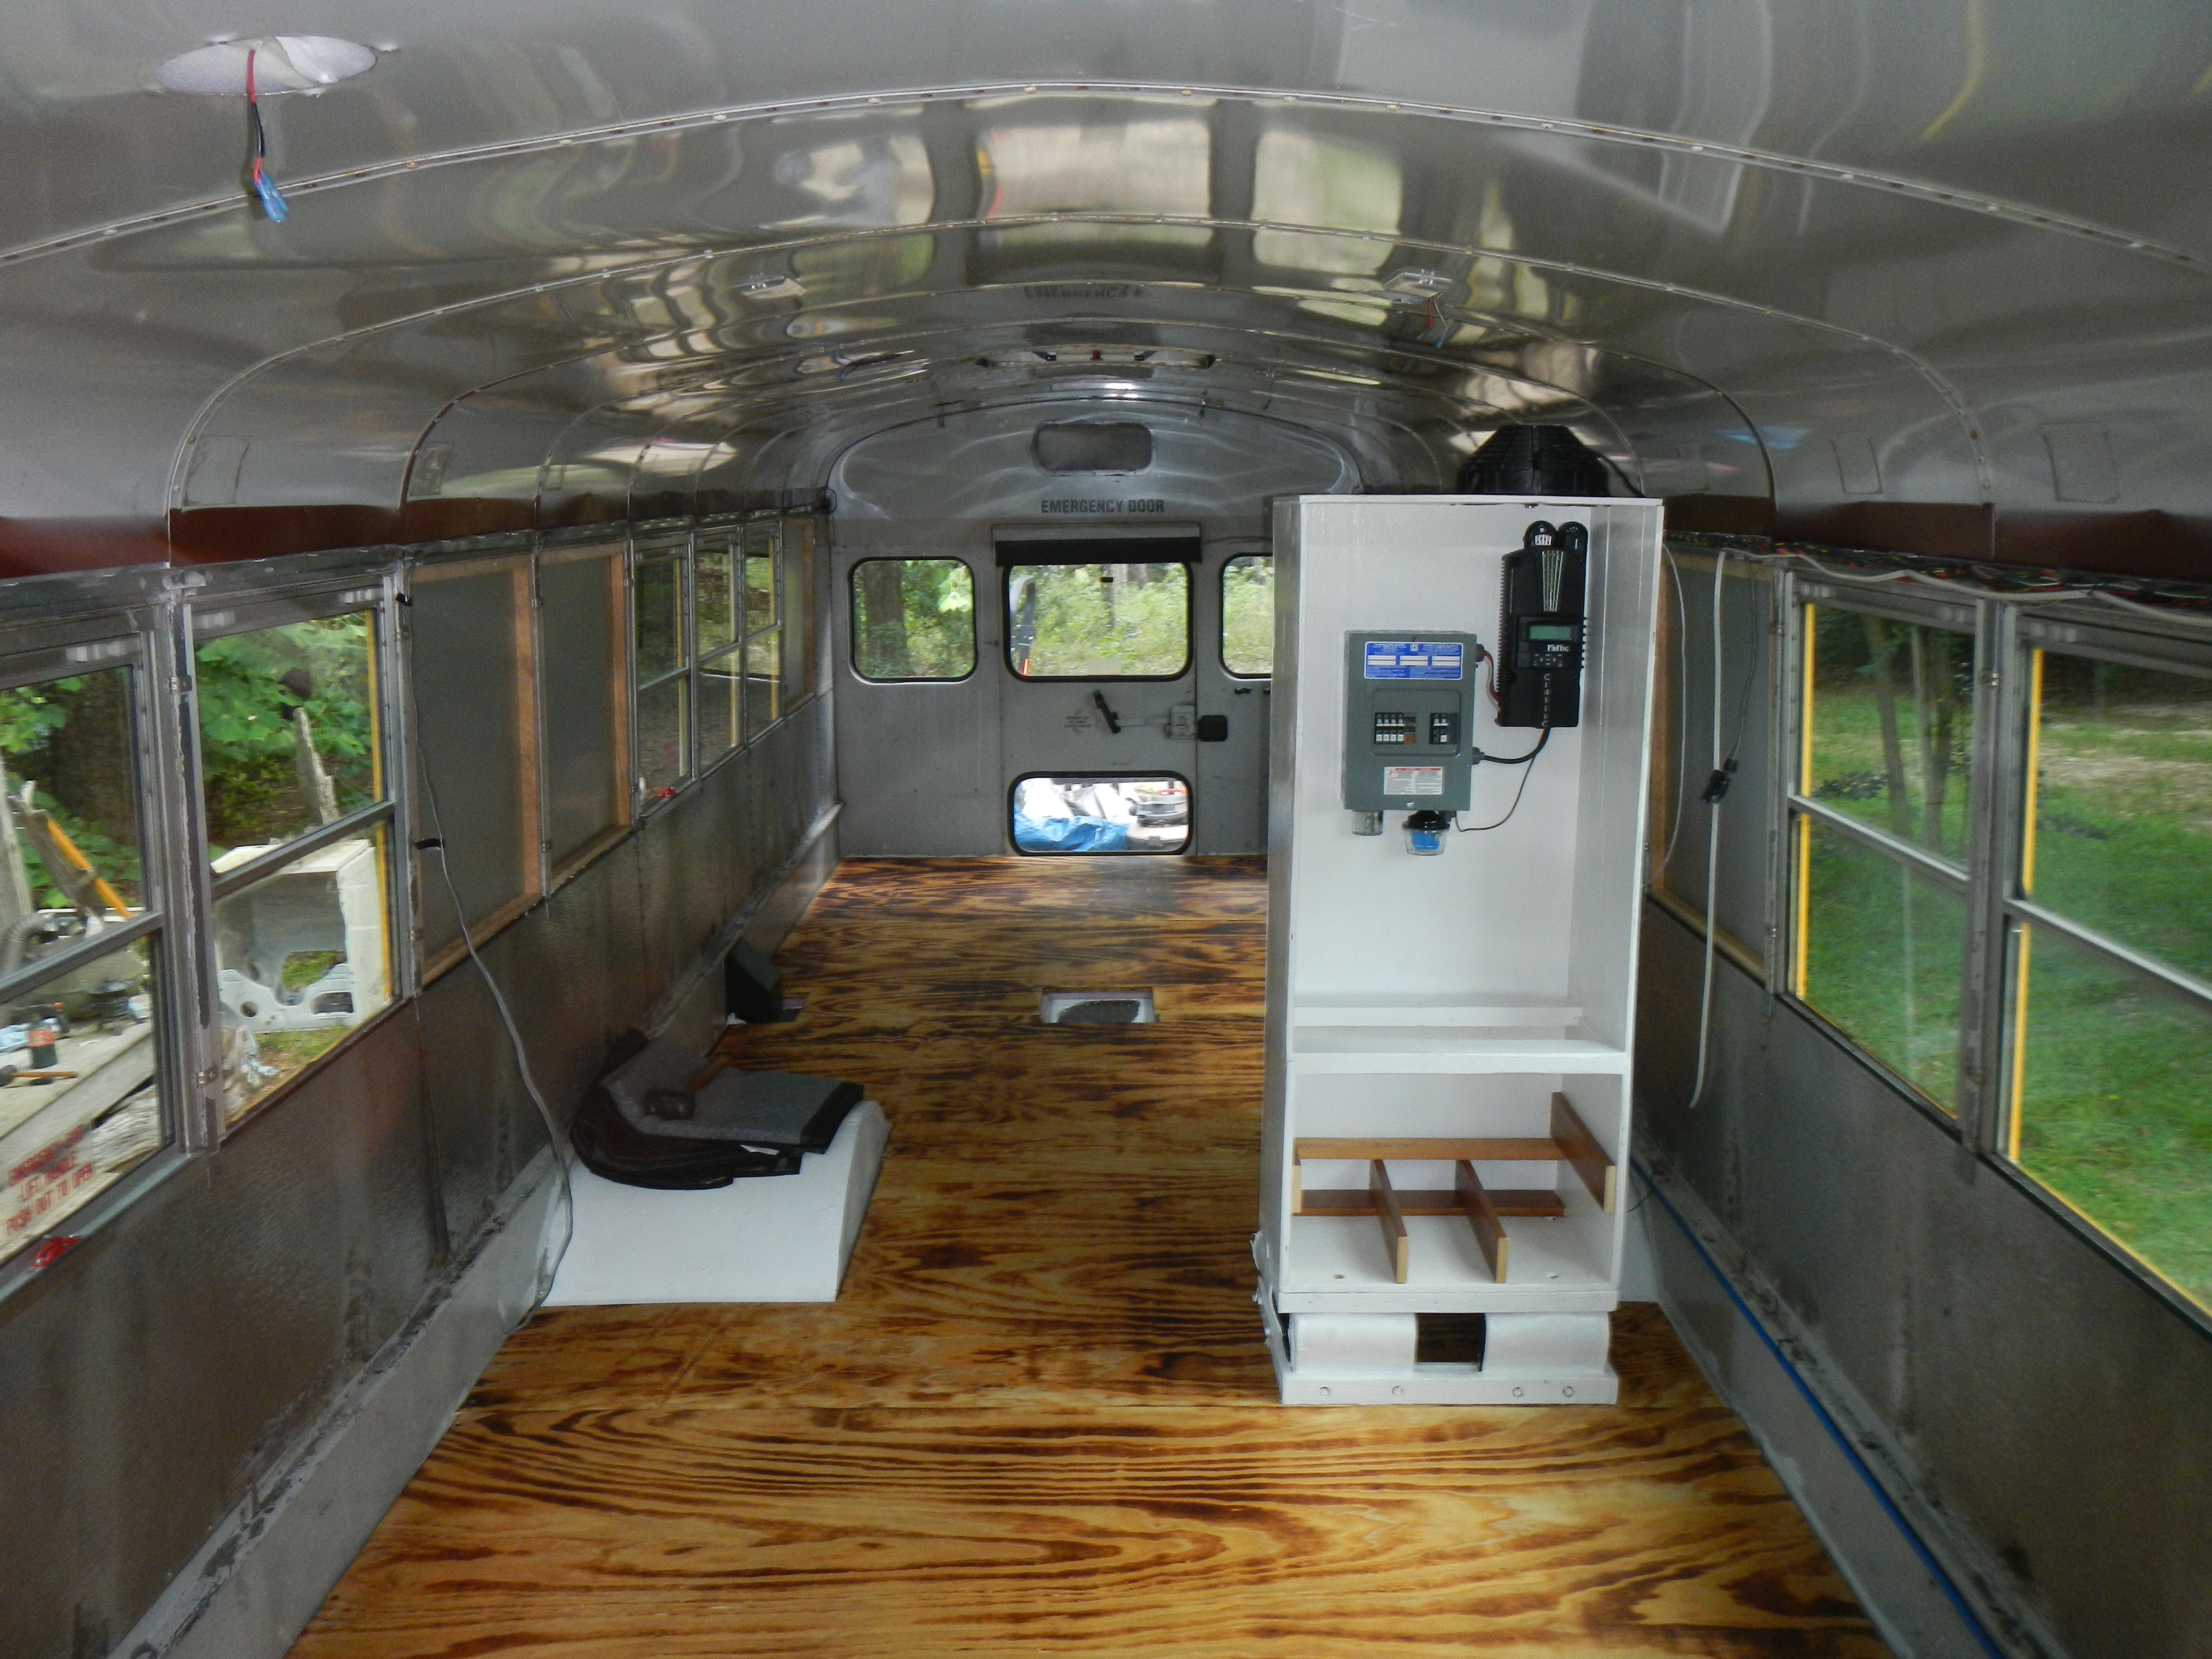
Since the cabinet has been moved into place, I have finally been able to install and wire up the inverter and batteries which have been sitting around since early June. That has taken up the last couple of days, but will get its own dedicated post soon™.